在 NetFront浏览器 640x480分辨率下获得最佳浏览效果
我的 Zaurus SL-C3000 和 SL-C3100
Copyright 2006 Hd Luc (hdluc@yahoo.com)
中文化:2007 Wells Wang (http://wells.osall.com) ,ccpaging
![[icon]](images/custom/icon.gif) 定制系统:
定制系统:
在网上能找到的大部分的关于 SL-C3000 的信息都是日文的,而且许多指令还是用于Zaurus 的旧机型的。虽然因为 C3000 的向下兼容性使得一部分信息依旧有效,但是,并不是所有的信息都能适用。因为 C3000 是比较新的型号,所以在这些指南中,还有一些新的功能特性没有被提到。此外,一些在旧机型上能够正常工作的指令在 C3000 上却无法执行了,因为在 C3000 上,这些功能可能用其它的方法来实现了。这份指南是专门为 SL-C3000(有时也被称为 Spitz)所写的,不过其中的部分信息能够在相近的型号上应用。尽管 C3100(也被称为 Borzoi)和 C3000 在某些地方有很大的差别,但两者的相似度还是很高,所以文中的大部分信息也可以应用在 C3100 上,如果有差别,在文中会被特别指出。
一些定制化的内容需要先下载一些额外的文件,你可以在 CF/SD 卡上或通过 USB 连接在 /home/zaurus/Documents 这个目录中创建一个名为 custom 的目录,然后把这些 定制化文件 复制到这个目录中。下面的大多数指令都假设这些文件已经被放到了 /home/zaurus/Documents/custom 这个目录中。
你所需要做的第一件事可能就是安装 终端/控制台软件 以及 备份你的 Zaurus。下面的这些指令主要是基于 Sharp 原厂的发行版本/ROM 的,尽管大部分可以在 Cacko 上运行得很好。
基本的软件包
下面的这些应用程序和工具是我认为的最基本的和必须要安装的:
- qkonsole - 一个有多标签(会话)、滚动条、颜色选择、历史记录、字体选择功能的终端控制台软件
- keyhelper - 允许你自定义和重映射按键
- c3000-custom-jaen - 在标签和菜单中加入英文
- opie-sh and/or qshdlg - 对话框和输入框的增强(一些应用程序需要)
- sudo - 如果使用正确的话能够增强系统的安全性(一些应用程序需要)
- unicodefonts-verdana - 扩展字符集的可旋转显示的字体
- automounter-c3000 - 启用 loop 和 USB 设备的自动挂载
- Tetsu's special kernel - 一个基于 Sharp ROM/发行版 的修正了一些烦人的 Bug 和改善了性能的增强型内核
下面是一些我总会安装的非常有用的应用程序:
在任务栏上显示的小应用程序(applet)
- clipboard-applet - 剪贴板
- qpe-suspendapplet - 允许你临时改变是否要启用休眠
- tasklistapplet - 允许你从列表中选择正在运行的程序(任务管理器)
- memoryapplet - 管理内存交换分区和查看内存使用状况
- combbattery-applet - 管理和查看电源的状态,以及超频和降频
下面这些程序库是一些应用程序经常用到的,应改安装它们来满足一般的依赖性关系:
程序库
还有一些经常用到的运行时环境,一些有用的服务或应用程序依赖于这些运行时环境:
运行时环境
- samba - 网络文件共享
- jeode - java 运行时环境
- perl - perl 解释器
- bvdd - 增强的图像驱动程序(显卡驱动)
- mplayer - 支持许多格式的媒体播放器
- xqt-gtk-jumbo - Qtopia 的 X Window 系统支持
- debian-pocketworkstation - 嵌入式的全功能的 Debian 环境
下面的命令行工具是非常重要的,它们提供在了当今任何一款操作系统中都希望有的功能。
命令行工具
- vim or pico - 控制台的文本编辑器
- file - 根据 mime 设定,告诉你文件类型
- dos2unix - 将文件从 DOS 格式转换成 UNIX 格式(换行符转换)
- unzip - 解压缩工具
- zip - 压缩工具
- bzip2 - 更新的压缩比更高的 bzip2 格式的压缩工具
- wget - 命令行的 http 下载客户端
- openssh-client - 安全终端 (ssh) 客户端
应用程序
- qpdf2-freetype - pdf 阅读程序
- yedit - 文本编辑器
- visualq - 图形编辑器
- qazoo - yahoo messenger 的翻版
- zicic - irc 客户端
- kino2 - mplayer 前端用户界面
- firefox - mozilla 网页浏览器
- thunderbird - mozilla 电子邮件客户端
- openoffice - 开放源代码的办公套件
一些改变界面观感的调整也是需要的。Sharp 出厂时默认的 Qtopia 的主题并不是很漂亮(根据各人的喜好)。把主题改成 Crystal-Blue 看上去会更好一些。在选择项中有一些主题供你选择,不过在网上能够下载到更多的主题供你安装。
此外,默认的图标和背景图片同样也能够改换。你可以安装一些图标美化包或者设置一些漂亮的背景图片。zicons-wmtux 就包含了我我所喜欢的图标,同时还有一些不错的背景图片。Plasterer 能够被用来保证在屏幕旋转时背景图片不发生变化。最后,用 LUSScreensaver 把那丑陋的默认的屏幕保护程序给替换掉。
更多的定制的细节将在下面详细说明。
安装软件包
软件包能够通过设置(Settings)标签下的软件包安装工具(Package Installer - qinstall)来进行安装或者删除。在默认设置下,Zaurus 将把软件安装到主内存空间,在 C3000 上会安装到 /hdd2 分区,在 C3100 上则是 /home 分区。如果应用程序允许的话,你也可以把应用程序安装到你的 SD 卡或者 CF 卡上。有些应用程序只能够被装到主内存里,另一些则可以被装到格式化成 ext2 或者 ext3 格式的 SD 卡或 CF 卡的分区上。甚至有一些软件可以被装到 FAT 格式的 SD 卡或 CF 卡的分区上。
![[screenshot of qinstaller]](http://www.users.on.net/%7Ehluc/myZaurus/screenshots/sc-installer.jpg)
此外,在控制台下,你也可以使用 ipkg 命令来安装或删除应用程序,例如:
|
# ipkg install ipkfile # ipkg remove ipkfile |
使用 ipkg 工具的好处是你能够用一个批处理脚本来批量的安装应用程序,例如所有你喜欢的字体,或者你的所有的安全工具。同时一旦发生错误,它也能显示详细的错误讯息,不像 qinstall 那样,只告诉你出错了,却没有任何的有用的信息反馈给你。
然而,在你选择把软件安装到 SD 卡或 CF卡上时,ipkg 工具并不会像 Qinstall(图形化的软件包安装器) 那样在安装时创建所需要的链接。你需要在使用 ipkg 在 SD 卡或 CF 卡上安装完软件后运行 ipkg-link 来为你安装的应用程序重新建立链接。不过,C3000 和 C3100 默认都没有带 ipkg-link 这个软件。我把它放在了我所提供的 ipktools 软件包里了。
默认情况下,软件包安装工具(Package Installer)和 ipkg 都会到 /hdd3/Documents/Install_Files 、/mnt/card/Documents/Install_Files 和 /mnt/cf/Documents/Install_Files 这三个目录下去找软件包。通过修改 /etc/ipkg.conf 加入类似下面的例子的内容,可以加入额外的软件包来源和 feed :
|
src zug http://www.zaurususergroup.org/feed/ |
我创建了一个名为 xipk(我的 ipktools 包的一部分)的脚本,允许你把软件包安装到你所喜欢的任何地方。这使你可以把软件安装到比主内存(C3000 是 /hdd2,C3100 是 /home)大得多的内置微硬盘的 /hdd3 分区上。不过不是所有的应用程序都能安装到 /hdd3,因为在默认的情况下,/hdd3 是被格式化成 FAT 格式的分区,而 FAT 格式的分区无法处理符号链接。如果你把这个分区重新格式化成 ext2 或 ext3 格式的话,你就不会有这个问题了(请查看后面的 /home 和 loopback 文件系统 这一章节)。
你安装的一些应用程序将会是日文版的。你可以查看 本地化 这一章节来了解如何把它转变成英文版的。你可以尝试一下 langswitch 这个工具,在大多数情况下,它都能奏效。
另外的,如果应用程序是为 Zaurus 的旧机型写的,你还需要改变应用程序的默认的显示方向。查看 显示方向 这一章节可以了解到如何来操作。
安装终端控制台
通过 USB 连接 Zaurus(先把 USB 线插入 PC,然后再插入 Zaurus)。把光盘里的终端软件的 ipk 文件 [qpe-terminal-ja_1.5.0-3_arm.ipk] 复制到 /Documents/Install_Files 目录。在 PC 上断开 USB 连接。Zaurus 会回到正常操作模式。在顶端点第三个标签,然后再点一个像小磁盘那样的图标。接着选择 Install_Files 的目录。在对话框里选择那个 ipk 文件(应该是那个目录里的唯一的文件)后安装程序会打开它。 按下安装按钮(最底下的大按钮)然后在弹出的对话框中按确认 OK(左面的那个按钮)。
如果你有一张 SD 卡或 CF 卡,以及一个读卡器的话,你只要把 ipk 文件复制到卡上,然后把卡插进 Zaurus 的扩展插槽内,就可以代替有时不能正常连接的 USB 连接方式了。
另一个更好用的终端软件 [qkonsole_0.9.3-20040205_arm.ipk] 可以从网上下载并用来替换光盘里附带的那个。
![[screenshot of qkonsole]](http://www.users.on.net/%7Ehluc/myZaurus/screenshots/sc-qkonsole.jpg)
大部分定制化的工作需要通过终端软件来完成,所以你真的需要安装一个。在这篇文章中,所有写在白色方框内的文字,都被假设为是在终端窗口中输入的,而灰色方框内的文字则都是配置文件的内容片断。在这篇文章中,我假设你已经知道了如何使用 vi。对于我个人而言,我喜欢 Vim (vi improved) ,并总是用它完成大多数的工作。不过如果你觉得 vi 难以掌握的话,你可以使用 pico,它的用法和 DOS 下的 edit(查看 pico 的章节来了解如何安装它)类似,然后不管你看到指令要求你用 vi 打开或是创建一个文件,都用 pico 来完成。vi 中的 esc 键在 Zaurus 中被映射到了 cancel 键上。
本地化 / 转换到英文版
C3000 和 C3100 出厂时默认是日文版的。具有讽刺意味的是, Qtopia 和绝大部分的 Linux 都是在英文环境下开发的,Sharp 把它们全部修改成了日文版,而我们又不得不把它再改回来。正因为这样,除了一些在日语环境下写的软件以外,把 Zaurus 改回英文版还算是一件比较容易的事情。有很多方法可以把系统改回纯英文的模式,甚至可以用一些脚本来自动完成转换整个过程。不过我认为有日语支持也挺有用的,所以我并不打算把日语支持给去掉。(甚至还要给旧版 Windows 系统加上了日语支持?)
改回英文版的步骤(快捷,但是不完美):
打开终端,修改 /home/zaurus/Settings/locale.conf 文件,用 'en' 替换掉 'ja'。
|
[Language] Language = en [Location] Timezone = Australia/Sydney |
重起 Zaurus
本地化成英文版,但还保留日文支持:
(英文菜单,标题同时包含英文和日文的信息)本地化的目标是保留所有的日文版的功能的同时,把菜单转换成英文,条目的内容则是英文和日文混合的。日文的输入法、字体、和字典的功能将不受这个定制作业的影响,依然能够正常使用。
|
# su # cd /home/QtPalmtop/i18n/ja # mkdir .hide # mv *.qm* .hide # mv .hide/libjpn* . # cp /home/zaurus/Documents/custom/movieplayer.qmid . # chown root:qpe movieplayer.qmid # chmod 640 movieplayer.qmid # cd /home/QtPalmtop/i18n/en # cp /home/zaurus/Documents/custom/movieplayer.qmid . # cp /home/zaurus/Documents/custom/libsl.qmid . # chown root:qpe *.qmid # chmod 640 *.qmid # cd /home/QtPalmtop/bin # mv word-eucJP.rc word-eucJP.rc.hide # cd /home/QtPalmtop # tar cf apps-orig.tar apps # gzip apps-orig.tar # cp /home/zaurus/Documents/custom/apps-mod.tar . # tar xf apps-mod.tar # chown -R root:qpe apps # cd /home/QtPalmtop # tar cf etc-orig.tar etc # gzip etc-orig.tar # cp /home/zaurus/Documents/custom/etc-mod.tar . # tar xf etc-mod.tar # chown -R root:qpe apps # cd /home/zaurus # tar cf Settings-orig.tar Settings # gzip Settings-orig.tar # cp /home/Zaurus/Documents/custom/Settings-mod.tar . # tar xf Settings-mod.tar # cd Settings # chown zaurus:qpe *.conf # chmod 644 *.conf |
重起 Zaurus 后,你的系统界面将会象下面这样:
![[screenshot of result]](http://www.users.on.net/%7Ehluc/myZaurus/screenshot.jpg)
这个软件包 [c3000-custom-jaen_0.2_arm.ipk] 会自动执行上面所有的步骤。我在需要把我的 Zaurus 回复出厂设置时,就使用这个软件包来本地化。这个软件包在 C3100 和 C1000 上同样也可以使用。如果你想回到日文版的话,只要简单的卸载这个软件包就可以了。
在你本地化之后,有一些软件安装后仍然显示的是日文信息,不过,其中的大部分都是可以方便
在 F1 - F10 in are mapped to Fn + 1 to 10 respectively.
的被修改为英文版的。检查一下 /home/QtPalmtop/i18n/ja 目录,看看里面是不是多了一个以你新安装的软件命名的 qm 文件,只要把它移到 .hide 目录就行了。不过,有一些一日文开发的软件的本地化就没那么容易了。我创建了一个 [langswitch_0.2_arm.ipk] 软件包可以让你通过图形界面(需要 opie-sh 支持)来把 qm 文件移走或恢复。
帮助文件仍然是日文的。如果那令你烦恼,你需要装一个英文版的。你可以从 Cacko 的 feed 安装 helpfiles_1.23-lite-1_arm.ipk。安装完成后在 help 目录创建一个从 ja 到 en 的链接:
|
# su # cd /home/QtPalmtop/help # mv ja ja.orig # ln -s en ja |
通讯录软件可以显示英文的菜单和文本,但是通讯录的条目还是按照日文假名顺序进行排序的。如果你想要让他们按英文字母顺序排序,而不管里面的日文的话,你可以安装 [qtopia-addressbook_1.23_arm.ipk]。
如果你想让 Netfront 能够显示除了英文和日文以外的例如德文的变音记号、法文的重音记号,以及其它的特殊字符的话,修改 /home/zaurus/Applications/netfront3/prefs 文件,找到 FontFamilyJa:,添加或修改 FontFamilyEn: ,并把它设置成例如 verdana 那样的包含扩展字符集的字体。推荐你使用这个软件包:unicodefonts-verdana_1.5.0-3_arm.ipk
|
FontFamilyEn: verdana FontFamilyJa: lcfont |
* 译者注:关于 本地化 / 中文化 的信息,可以参考译者的这篇文章:汉化 Zaurus SL-C3100 的 SHARP 原厂 ROM
字体
Zaurus 在出厂时预先安装了以下字体:
- lcfont
- fixed
- helvetica(与 mico-unicodefonts-helvetica_1.5.0-1_arm.ipk 一样的字体)
- micro
- smallsmooth
- smoothtimes
不幸的是,日文字符的编码与一些 latin 的扩展字符的编码有重叠,所以无法正确的映射这些字符相冲。在这个方面,unicode 字符会有一些帮助。不过,很多字体都没有全部的 unicode 字符,这时只能显示一个小方框来代替。实际上,确实存在一个含有所有 unicode 字符的字体,而且字符编码都是正确的,当然,这样的字体对应每一个字号都需要使用超过 1M 的内存。
下面的字体含有几乎所有的字符,不过 unifont 字体只有 16 点阵的字体。
- unismall_1.0.0_arm.ipk
- unifont_1.0-1_arm.ipk
拥有一个含有尽可能多的字符的字体文件是一个好的开始,当然这还依赖于应用程序能否使用 unicode,并且是否能够提取正确的字符并显示它们。某些字体可能忽略了屏幕翻转后产生的细节差异,这样,在屏幕旋转时,字体的显示效果就会很差。如果你发现这种情况,一定要确认你安装了屏幕翻转时与之对应的字体。
我已经加入了以下扩展字体文件:
- unicodefonts-verdana_1.5.0-3_arm.ipk
- mico-unicodefonts-georgia_1.5.0-2_arm.ipk
- mico-unicodefonts-utopia_1.5.0-1_arm.ipk
- vga-console-font_1.0-1_arm.ipk
- fonts-bitstream-vera-sans-mono-50_1.1_arm.ipk
- fonts-bitstream-vera-sans-mono-75_1.1_arm.ipk
- FreeSerifFont_20031008_all.ipk
- FreeSansFont_20031008_all.ipk
- FreeMonoFont_20031008_all.ipk
- misaki8_0.04_arm.ipk
- naga10_0.02_arm.ipk
- shnm12_0.03_arm.ipk
- shnm14_0.03_arm.ipk
- shnm16_0.05_arm.ipk
- ayu18_0.02_arm.ipk
注意:unicodefonts-verdana_1.5.0-3_arm.ipk 是在 mico-unicodefonts-verdana_1.5.0-2_arm.ipk 的基础上加入了可适应屏幕翻转的字型后重新打包生成的字体。
这些都是用于 Qtopia 和应用程序的默认字体。X/Qt 和 Pocketworkstation 使用不同的字体集合。Qtopia 的字体存储在 /opt/QtPalmtop/lib/fonts。Zaurus 的字体使用 Trolltech 的 QT Prerendered Format (QPF) 字体格式。如果你想使用其它的字体,可以用一个由 Trolltech 提供的名叫 makeqpf-arm 的工具把你的字体文件转换成 Zaurus 的字体格式。
在日文系统中(也就是说当你的 locale 被设置为 ja 的时候,ja 是 Zaurus 默认的语言选择),lcfont 是默认的系统字体。然而 Qtopia 在找不到它所需要的字体时,它会把 helvetica 作为缺省字体。
在生成字体时,你需要生成两个版本的字体,一个用于竖屏模式,另一个用于横屏模式。旋转过的 qpf 字体文件的文件名末尾会以 t10 来结尾。
下面的例子说明了把 arial.ttf 字体转换成 16 点阵 qpf 的横屏和竖屏字体所需要的步骤。在转换过程中,你的 Zaurus 看起来像是死机了,而且完成后你还需要重启你的 Zaurus。所以,在执行以下步骤之前,一定要确认你已经保存了所有已打开的文件:
|
# mkdir -p /hdd3/build/lib/fonts # cp arial.ttf /hdd3/build/lib/fonts # export QTDIR=/hdd3/build # cd $QTDIR/lib/fonts # echo "arial arial.ttf FT n 50 160 s" > fontdir # makeqpf-arm -display Transformed:Rot0 -A # makeqpf-arm -display Transformed:Rot270 -A # cd /hdd3/build # newipk arial # cp /hdd3/build/lib/fonts/*.qpf /hdd3/arial/data/opt/QtPalmtop/lib/fonts # makeipk arial # su # reboot |
在执行以上步骤之前,你应该预先从 Trolltech 下载了 amkeqpf-arm,并且把已经它解压缩到了环境变量 PATH 所包含的路径里,如 /usr/local/bin。同时,也需要你先安装好 ipktools 这个软件包。
最后,日文中把字符 ⁄ 显示成 ¥ 。不过这只是显示错误,而系统中所使用的字符是正确的,不用为此担心。
键盘映射
Zaurus 有一个和笔记本电脑类似的完整的 QWERTY 键盘,不过有一些特殊字符必须通过 功能键(Fn)来组合输入。大部分按键组合已经清楚地在键盘上标明了,不过,还是有一些没有标明或遗漏的。下面的一些键位映射对于大多数应用程序都是有效的,但是有一些应用程序因为编码页的关系无法辨认而忽略这些按键组合。
截屏键:
- Fn + Shift + c
导航键:
- Fn + up arrow = Page Up
- Fn + down arrow = Page Down
- Fn + left arrow = Home
- Fn + right arrow = End
其它有用的未标识的按键:
- Shift + - = `
除此以外,还有一些其它的基本的按键需要被映射。你可以安装 keyhelper [keyhelper_1.2.2-1_arm.ipk] 然后把 keyhelper.xml 放到 /home/zaurus/Settings 目录下,最后在终端控制台重新载入键位映射表。
|
# cd /home/zaurus/Settings # cp /home/zaurus/Documents/custom/keyhelper.xml . # khctl reload |
如果你安装 keyhelper-c3000map [keyhelper-c3000map_0.4_arm.ipk] 的话,它会自动完成上面的那些步骤,同时它还会启动象下图所示的那样的 keyhelper 的菜单。
![[screenshot of keyhelper menu]](http://www.users.on.net/%7Ehluc/myZaurus/screenshots/sc-khmenu.jpg)
keyhelper 会提供如下的键位映射:
- 按住 Shift 键 - 按住 Shift 键然后再按其它按键,可以按出 Shift 变换后的字符
- 按住 Fn 键 - 按住 Fn 键然后再按其它按键,可以按出按键上方的蓝色标出的字符
- 按住 Ctrl 键 - 按住 Ctrl 键然后再按其它按键,Ctrl 组合键
- Alt 键 - Ctrl 键旁边的日文按键(カナ / ひら)
- Shift+Mail 打开 应用程序/快捷菜单 显示常用程序
- Shift+Address 打开文件菜单显示常用文件
- Shift+Calendar 显示通用任务的设置菜单
- Home = 在菜单标签间切换
- Shift+Home 切换到下一个应用程序
- Menu key - 打开当前程序的下拉菜单,或当按下快捷键时在快捷菜单上打开应用程序
- Shift+Menu 任务选择器,类似于 Windows 系统上的 alt + tab
- Ctrl + Menu 当 Menu 不起作用时,同 Alt + f (打开文件菜单)
- 将 / 和 , 的按键方式进行了交换。key
- Fn + o = {
- Fn + p = }
- Ctrl + t = «(左书名号)
- Ctrl + y = »(右书名号)
- Ctrl + w = ×(乘号)
- Ctrl + r = ÷(除号)
- Ctrl + - = ±(正负号)
- Ctrl + m = º(度)
- Ctrl + q = ´
- Fn + q = ` (这是一个重复的输入方式,不过我不喜欢 Shift 和 - 的组合)
- Ctrl + a = ä (umlaut a)
- Ctrl + Shift + a = Ä (umlaut A)
- Ctrl + o = ö (umlaut o)
- Ctrl + Shift + o = Ö (umlaut O)
- Ctrl + u = ü (umlaut u)
- Ctrl + Shift + u = Ü (umlaut U)
- Ctrl + i = î (circumflex i)
- Ctrl + Shift + i = Î (circumflex I)
- Ctrl + e = æ (ae)
- Ctrl + Shift + e = Æ (AE)
- Ctrl + s = ß (eszett)
- Ctrl + Shift + d = Ð (D with eth)
- Ctrl + 1 = è (e with grave)
- Ctrl + 2 = È (E with grave)
- Ctrl + 3 = é (e with acute)
- Ctrl + 4 = É (E with acute)
- Ctrl + 5 = ê (e with circumflex)
- Ctrl + 6 = Ê (E with circumflex)
- Ctrl + 7 = ë (e with diaeresis)
- Ctrl + 8 = Ë (E with diaerisis)
- Ctrl + 9 = ç (c with cedilla)
- Ctrl + 0 = Ç (C with cedilla)
- Fn+Shift 可以作为 Alt 键,提供 Alt 键和除了 x, c, v 键以外的 a-z 以及 0-9 的组合键功能(在一些应用程序中 Alt 键,也就是 Ctrl 旁的日文键无法正常工作)
/home/zaurus/Settings/keyhelper.conf 文件包含了菜单项的显示和所执行的命令的定义。如果你想自定义你的键位映射,你可以安装 keyhelperconf,它可以帮助你得到你所需要的映射的正确的 XML 代码:
![[screenshot of keyhelperconf]](http://www.users.on.net/%7Ehluc/myZaurus/screenshots/sc-keyhelperconf.jpg)
同样,你也可以自定义屏幕右侧以及键盘下方的的应用程序快捷键。Settings 标签下的 ApplicationKey 工具可以让你为这些应用程序快捷键指定各自被按下时要打开的程序。
![[screenshot of applicationkey]](http://www.users.on.net/%7Ehluc/myZaurus/screenshots/sc-applicationkey.jpg)
我的设置是这样的:
- Dictionary -- 字典
- Calendar -- Qkonsole 终端
- Address -- MusicPlayer 播放器
- Mail -- NetFront 浏览器
- Home -- Home
- Menu -- Menu
下面是一些 Qkonsole 中非常有用的快捷键:
- Fn+s 在不同的终端控制台中切换
- Fn+n 创建一个新的终端控制台
- Fn+5 切换到全屏
- Shift+Up 向上翻屏
- Shift+Down 向下翻屏
如果你在按下键盘下方的功能键时,在屏幕上得到 ~0, ~1, ~2, ~3 的话,把我修改过的 linux.keytab 和 vt100.keytab 复制到 /opt/QtPalmtop/etc/keytabs 就能解决问题了。
|
# su # cd /opt/QtPalmtop/etc/keytabs # cp /home/zaurus/Documents/custom/linux.keytab . # cp /home/zaurus/Documents/custom/vt100.keytab . |
下面是 NetFront 浏览器中的一些有用的快捷键:
- Fn+h 主页
- Fn+r 刷新
- Fn+s 保存
- Fn+u 查看前一个链接
- Fn+i 查看下一个链接
- Fn+d 添加书签
- Fn+f 查找
- Fn+k 切换搜索工具栏
- Fn+m 新建标签
- Fn+b 关闭标签
在 Zaurus 的 vi 中 esc 键被映射到了 cancel 上。
在 midnight commander 中 F1 - F10 被分别映射到了 Fn + 1 到 10 上。
X/Qt(以及使用 X/Qt 的 Debian PocketWorkstation)由他自己的键位映射。如果你的键位映射有问题的话,下载 xmodmaprc-c3000 并把它放到 /home/zaurus 以及 /home/root 目录下,并更名成 .xmodmaprc 。
.xmodmaprc 作了如下的修正来使 X/Qt 下的键位映射和 keyhelper 类似:
- 交换 / 和 , 的按键方式
- Fn + q = `
- Ctrl + q = '
- Fn + o = {
- Fn + p = }
Menu 键会激活 X/Qt 的控制。
![[screenshot of x-control]](http://www.users.on.net/%7Ehluc/myZaurus/screenshots/sc-xcontrol.jpg)
Fn + m 会中止 X/Qt 的运行。
如果你的按键按下后字符都变大写了,按住 Shift 键几秒后松开再试,就会发现按键又回复到小写的状态了。
文件关联
文件关联的信息被分别放在两个地方。/opt/QtPalmtop/etc/mime.types 文件存放了需要关联的 mime 类型,它会和 /opt/QtPalmtop/apps 下的 desktop 文件合并起来最终得到文件的关联信息。
存在 mime.types 文件里的信息指出了文件的后缀名和文件类型的关联。而每一个应用程序的 desktop 文件将会指明它能处理哪些类型的文件。如果有多个应用程序关联到了同一种文件类型的话,将只有一个是有效的,不过,我并不知道 Zaurus 是用哪种逻辑来决定要使用哪一个应用程序的。你可以为每一种文件类型只指定一个应用程序来获得你想要的文件关联效果。
下面以 Opera 关联 .htm 和 .html 文件作为例子,你将会看到 mime.types 文件中有如下内容
| text/html html htm |
在 opera.desktop 文件中则会有下列内容:
|
MimeType=text/html MimeTypeIcons=opera |
你还可以象上面的例子那样,给文件关联设置一个图标,多个关联可以用分号(;)来分隔。
屏幕显示方向
C3000 和 C3100 有着比旧型号机器有更高的分辨率的屏幕(640x480)。旧的应用程序被设计成为适合那些默认就是直版竖屏的旧型号机器(因为那是那些机型的默认显示模式)。C3000 和 C3100 对横屏和竖屏都能支持。贝壳式的设计可以检测到屏幕是否旋转,如果旋转则能够自动调整屏幕显示的方向。不过,如果应用程序是为旧机型的竖屏设计的,系统也会自动把显示模式切换到竖屏模式。
![[screenshot of app properties]](http://www.users.on.net/%7Ehluc/myZaurus/screenshots/sc-properties01.jpg)
要解决这个问题,用触笔长按应用程序的图标几秒后,在弹出的属性窗口中去掉 "Display with magnified screen" 前面的勾去掉(对每个有这种情况的应用程序都要设定一次)
或者你也可以把下面的代码加到 /opt/QtPalmtop/apps 目录下相应的 .desktop 文件中。
| Display=640x480/144dpi,480x640/144dpi |
只有在 desktop 文件中不含有 Display=640x480/144dpi,480x640/144dpi 这个信息的应用程序才会有 Display with magnified screen 这个选项,不过,如果 /home/zaurus/Settings/Launcher.conf 文件中 EnableForcedVGA 的值被设置成了 0 的话,这个选项同样也是无效的。在 /home/zaurus/Settings/display.conf 文件中,如果值为 3 则意味着应用程序将运行在 640x480 的分辨率下。
以 root 身份运行
在默认情况下,应用程序是以 zaurus 身份运行的,然而,有一些应用程序必须要有 root 权限才能够正常运行。
![[screenshot of app properties]](http://www.users.on.net/%7Ehluc/myZaurus/screenshots/sc-properties02.jpg)
要实现这个,用触笔在应用程序的图标上长按几秒,在弹出的属性窗口中勾选 "Execute with root priviledge"。
预加载应用程序
有些应用程序在系统启动时就被预加载了。这就意味着,在 Zaurus 启动的时候,这些应用程序就被加载到了内存中。这使得这些应用程序能够非常迅速的被打开,因为事实上它们已经被加载到内存中了。不过,正因为这样,它们同时也消耗了不少空余的内存。
![[screenshot of app properties]](http://www.users.on.net/%7Ehluc/myZaurus/screenshots/sc-properties03.jpg)
你可以通过禁用这些被预加载的程序的预加载选项来阻止它们被系统预加载,从而获得更多的空余内存。要完成这个工作,只要用触笔长按应用程序的图标几秒钟,在弹出的属性窗口中去掉 "Fast load (consumes memory)" 前面的勾。
自定义开机画面
自定义开机画面是可行的。开机时显示的图象是一个 90 度旋转(480x640)的 24 位色的名为 Startup_screen.bmp 的 bmp 图像文件。你只要简单的把它复制到正确的位置,在开机的时候系统就能读取到了。
|
# su # cp /home/zaurus/Documents/custom/Startup_screen.bmp /opt/QtPalmtop/pics144 |
下次开机是,画面就会是这样:
![[startup screen]](images/custom/startup.jpg)
如果你想去掉开机时的 Sharp 标志的画面,你需要关闭 Sharp Logo 选项后重新编译内核。Tetsu 的内核就是这么做的。
/root/etc/rc.d/rc.sysinit 文件决定了系统在启动时会做哪些事。它会运行在 rc.d 目录下的被请求的 runlevel 下面的所有脚本,然后再运行 rc.rofilesys 。然而,在这个文件中,通常最后一个被运行的 rc.local 文件被注释掉不被运行了。你可以取消下面这段代码的注释使它在系统启动时被运行:
cd /etc/rc.d
if [ -f "./rc.local" ];then
  if [ -x "./rc.local" ];then
    echo "*** Running rc.local"
    ./rc.local
  fi
fi
|
或者,你也可以修改 /home/QtPalmtop/qpe.sh 来使它运行 /etc/rc.d/rc.local
    sdisp /home/QtPalmtop/pics144/Startup_screen.bmp &
    /etc/rc.d/rc.d/rc.local
    cd
    if [ -f /etc/restorefile ]; then
        export LD_LIBRARY_PATH=/usr/QtPalmtop.rom/lib
    else
        export LD_LIBRARY_PATH=$QTDIR/lib
    fi
    qectrl -c
|
在 rc.sysinit 和 qpe.sh 中运行 rc.local 的不同之处在于,如果是在 rc.sysinit 中运行,则运行 rc.local 脚本的输出信息在系统启动时将会显示在屏幕上(如果使用 tetsu 的内核),而在 qpe.sh 中运行的话,将不会显示,因为它会被启动画面覆盖掉。
自定义墙纸
C3000 和 C3100 可以使用 png 或 jpg 图片文件作为墙纸。在默认情况下如果你在 设置(Settings)标签下使用 外观(Appearance)应用程序的话,你所选择的图像将会作为背景平铺,除非你所选择的图象正好适合你所期望的显示方向的屏幕的大小(减掉 Qtbar 的高度 640x460 或者 480x620)。不过,当你旋转屏幕时,显示的比例就不对了,图像就只能平铺在桌面上了。
如果你安装了 Plasterer [plasterer_2.1.0-1_arm.ipk] 的话就可以解决这个问题,它可让你选择是居中还是平铺你所选择的图片。然后它会生成两个图像文件:vImage.png 和 hImage.png,在你旋转屏幕时它会选择合适的图片作为背景。你可以用两张完全不同的图片来替换掉这两个文件。
![[screenshot of plasterer]](http://www.users.on.net/%7Ehluc/myZaurus/screenshots/sc-plasterer.jpg)
我创建了以下几套横竖配套的背景图片,这样在 Zaurus 上,不管屏幕是横屏还是竖屏显示,都能取得不错的效果:
 |
 |
 |
 |
 |
 |
 |
 |
注意:上面的图片中,大部分取自 Cresho 的 zaurusthemes.org 网站。那里有更多的漂亮的背景图片,这里的几张只是我比较喜欢的而已。
你可能已经注意到这个应用软件是日文版的。在设置(Settings)标签下使用语言切换(Language Switcher [en])工具(如果你已经安装了 langswitch 的话)来移走 qm 文件,这样软件就变成英文版的了。
当你使用 Plasterer 生成了 hImage.png 和 vImage.png 这两个文件之后,你可以使用 bgswitch [bgswitch_0.1_arm.ipk] 来切换使用/home/zaurus/Documents/Image_Files/wallpaper 目录下的可用的背景图片。
自定义屏幕保护
C3000 和 C3100 的默认的屏幕保护真的很丑陋。你可以安装下面的软件包来美化屏幕保护:
- LUSScreenSaver - [LUSScreenSaver_1.4.6-1_arm.ipk]
- LUSScreenSaverUtil - [LUSScreenSaverUtil_1.3.5-1_arm.ipk]
![[screenshot of screensaver]](http://www.users.on.net/%7Ehluc/myZaurus/screenshots/sc-screensaver03.jpg)
另外还要安装下面的至少一个软件包:
- LUSSSFish - [LUSSSFish_1.0.0-1_arm.ipk]
- LUSSSMessage - [LUSSSMessage_1.0.0-1_arm.ipk]
- LUSSSPicture - [LUSSSPicture_1.1.1-1_arm.ipk]
- LUSSSUniverse - [LUSSSUniverse_1.0.0-1_arm.ipk]
你可能已经注意到这个应用软件是日文版的。在设置(Settings)标签下使用语言切换(Language Switcher [en])工具(如果你已经安装了 langswitch 的话)来移走 qm 文件,这样软件就变成英文版的了。
Menu and Tab Customisation
You can re-organise tabs and applications using the TabConf/TabSetting tool. Alternatively, you can also move files around under /home/QtPalmtop/apps, but those changes will not apply until you restart Qtopia, reboot the Z, or run TabSetting and apply the settings by saving them. There are also two hidden files in each sub-directory called .order and .directory which can be manually changed as well.![[screenshot of tabsetting]](http://www.users.on.net/%7Ehluc/myZaurus/screenshots/sc-tabsetting.jpg)
In addition, you can customise the icons that are displayed for each application on the menu, and also the icons displayed for the applications according to their mime associations.
The icons for the menu and the tabs are located under /opt/QtPalmtop/pics144. Qtopia will always search this location for the icons first. If no icon is found with the specified name, then it will also search under /opt/QtPalmtop/pics as well. If an icon exists with the same name in each location, then the icon in /opt/QtPalmtop/pics144 is used.
The default icons that come with the default Sharp ROM on the C3000 are located under /hdd1/usr/QtPalmtop.rom/pics144 and /hdd1/usr/QtPalmtop.rom/pics and are symbolically linked to /opt/QtPalmtop/pics144 and /opt/QtPalmtop/pics144 respectively.
Similarly on the C3100, they are located under /usr/QtPalmtop.rom/pics144 and /usr/QtPalmtop.rom/pics and are symbolically linked to /opt/QtPalmtop/pics144 and /opt/QtPalmtop/pics144 respectively.
The icons for file association are by default searched under /opt/QtPalmtop/pics. When installing applications, they add their icons to /opt/QtPalmtop/pics144 and/or /opt/QtPalmtop/pics. Usually icons under /opt/QtPalmtop/pics144 are 64x64 in size and icons under /opt/QtPalmtop/pics are 32x32 in size. However, some special smaller icons of size 28x28 are also located in /opt/QtPalmtop/pics144 and size 14x14 under /opt/QtPalmtop/pics
The icons can be customised by replacing the icons used by the applications or copying additional icons to those locations and using the TabConf utility to change the icons used for the applications. Alternatively, each .desktop file under /opt/QtPalmtop/apps can also be manually modified. If you replace an icon by copying over another icon file with the same name, then you will not see the new icon until you reboot because Qtopia still has the old icon in cache.
customised start menu:
![[start menu]](http://www.users.on.net/%7Ehluc/myZaurus/custom.jpg)
The following is a list of the names of the icons that need to be replaced in order to change the look and feel of the default Qtopia desktop. Since some of these icons are symbolic links, the symlinks need to be deleted first before a new icon can be copied to replace them. I have replaced and added the following default icons:
Settings- Installer Icon - qinstall_icn.png
- TabSetting Icon - tabconf.png
- Light Icon - Light.png
- Sound Icon - ssoundconf.png
- Appearance Icon - Appearance.png
- Network Icon - PPPConnect.png
- Security Icon - Security.png
- Calibrate Icon - Calibrate.png
- ApplicationKeys Icon - CustomizeKeys2.png
- SystemTime - DateTime.png
- UserDic Icon - userdic.png
- Backup/Restore Icon - BackupRestore.png
- SystemInfo Icon - SystemInfo.png
- Migration - DataMoving.png
- ReceiveData - DataMovingSL.png
- PC-Link(Samba) Icon - qtsamba.png
- IR-Receive Icon - Infrared.png
- TextEditor Icon - TextEditor.png
- Calendar Icon - DateBook.png
- AddressBook Icon - AddressBook.png
- TodoList Icon - TodoList.png
- Email Icon - EMail.png
- MoviePlayer Icon - MPEGPlayer.png (pics only)
- HancomSheet Icon - hancomsheet.png
- HancomWord Icon - hancomword.png
- ImagePad Icon - zimager/zimager.png
- Dictionary Icon - Zten.png (pics only)
- Translator Icon - translator.png (pics only)
- Calculator Icon - Calculator.png
- CityTime Icon - CityTime.png
- Clock Icon - Clock.png
- HelpBrowser Icon - HelpBrowser.png
- MusicPlayer Icon - MusicPlayer.png
- NetFront Icon - nf_logo.png (pics only)
- PhotoStorage Icon - photostorage.png (pics only)
- Start Button - go.png (pics144 only)
- Volume Button - volume.png (pics144 only)
- Wait Button - wait.png (pics144 only)
- ZoomIn Icon - zoomin.png (pics144 only)
- ZoomOut - zoomout.png (pics144 only)
- Rotation Icon - transform.png (pics144 only)
- Restart Icon - Restart.png
- Shutdown Icon - Shutdown.png
- Zaurus Home Icon - myzaurus.png
- Main Icon - MainDevice.png
- Main Icon (small) - MainDeviceS.png
- Folder Icon - slfolder.png
- Folder Icon (large) - slfolder_l.png
- Docs Icons - DocsIcon.png (pics144 only)
- Settings Icon - SettingsIcon.png
- Apps Icon - AppsIcon.png
- Games Icon - Games.png
Additionally, more icons were added, some are listed below
Menu Tabs:- AppsTab Icon - mbfolder-util.png
- OfficeTab Icon - mbfolder_office.png
- MultimediaTab Icon - mbfolder_multimedia.png
- GamesTab Icon - mbfolder_games.png
- SettingsTab Icon - mbfolder_system.png
- GraphicsTab Icon - mbfolder_graphics.png
- JavaTab - java.png
- Suspend Icon - tb_suspend.png
- Clipboard Icon - tb_clipboard.png
- TaskList Icon - tb_tasklist.png
- Run Icon - exec.png
- Aim Icon - aim.png
- Mirc Icon - mirc.png
- MSN Icon - msn.png
- Yahoo Icon - yahoo.png
- Apple Icon - apple.png
- BSD Icon - bsdunix.png
- Mac Icon - mac.png
- Microsoft Icon - microsoft.png
- Sun Icon - sun.png
- Book Icon - book.png
- Bunko Icon - bunko2.png
- Controller Icon - controller.png
- Database Icon - database2.png
- Download Icon - download.png
- FileServer Icon - fileserver.png
- Gens Icon - gens.png
- Hd Icon - hd.png
- InputConfig Icon - inputconfig.png
- Kino Icon - kino.png
- Konsole Icon - konsole.png
- LanConfig Icon - lanconfig.png
- Laptop Icon - laptop.png
- Microphone Icon - microphone.png
- mySQL Icon - mysql.png
- Paint Icon - paint.png
- Screen Icon - screen.png
- Server Icon - server.png
- Star Icon - star.png
- SMBController Icon - smbcontroller.png
- SMBMounter Icon - smbmounter.png
- Teleport Icon - teleport.png
- USB Icon - usb.png
- USBDrive Icon - usbdrive.png
The zicons-wmtux package [zicons-wmtux_0.2_arm.ipk] will replace the above listed icons with a set of nicer looking ones and also adds a few extra icons for applications. This package is based on the cool-icons package from cacko.biz and also the z-oslinux theme from zaurusthemes.org
![[screenshot of appearance]](http://www.users.on.net/%7Ehluc/myZaurus/screenshots/sc-appearance.jpg)
The Appearance tool under the Settings tab can be used to switch themes. Crystal Blue is one of my favourites, although a combination of SLStyle for the Style, umicons for the Title Bar and Gray for the Colour Scheme does look very good too.
Configuring bash
The Zaurus comes with bash 2.05 by default. It also comes with ash and sh which is the default shell for the root and zaurus user accounts. The zaurus user forks off and launches bash when you launch a console from within Qtopia. When you connect to the zaurus via telnet for example or su to root, you will get the default shell (/bin/sh) which is not bash. If you want to make bash your default shell, then edit /etc/passwd and change /bin/sh to /bin/bash
|
root:x:0:0:root:/home/root:/bin/bash zaurus:x:500:500:Zaurus User:/home/zaurus:/bin/bash |
You can also customise the bash prompt by creating or editing a file called .profile or .bashrc which is in the user's home directory, eg: /home/zaurus/.profile or /home/root/.profile
You can change the bash prompt by changing the PS1 variable definition to something simple like zaurus-:) or even something fancy with different colours.
![[screenshot of bash]](http://www.users.on.net/%7Ehluc/myZaurus/screenshots/sc-bash.jpg)
If you don't have a .bashrc file, you can just copy .profile for starters and then modify it.
Zaurus Home Directory
The zaurus user's home directory (/home/zaurus) is located on the /home partition (/dev/mtdblock3). On the C3000 it is only 4MB in size. It is physically located on the internal flash memory which is only 16MB in total on the C3000. This partition cannot be made bigger since the rest of the flash memory is used for the main rootfs (/dev/mtdblock2), the emergency rootfs (/dev/mtdblock1). The /home partition is also used to store kernel modules (/home/root/modules), system configuration (/home/zaurus/Settings and /home/etc/) and other things. In addition, some applications also store their configuration and data into the zaurus home directory (this is what linux apps are supposed to do), but it is not so ideal on the C3000. Thus the /home partition quite quickly fills up. It it advised to not store large files there, in fact, try avoiding saving anything there to preserve the precious space available on /home.
If you do run out of space, you can move some files and directories to /hdd2 or /hdd3 and symlink the files/directories. To simplify this, I have created a script zhomefix which will move all files and directories in /home/zaurus starting with . to /hdd2/zaurushome and symlink them back. If you are low on space on /hdd2 as well, you can modify zhomefix to move files to /hdd3/zaurushome instead.
On the C3100, however, the situation is slightly different. The internal flash memory on the C3100 is 128MB in size compared to the tiny 16MB on the C3000. Now you would think that the C3100 won't run out of space so easily. Unfortunately, that is not the case. The rootfs is now allocated 32MB instead of 4MB which was what it was on the C3000, and remember, there is also the emergency rootfs (smf). So after allocating some of the space for the other stuff, there is still 89MB of space left on /home. This isn't so bad after all you think, but wait, there is another surprise. On the C3000, the internal MicroDrive was partitioned into /hdd1, /hdd2 and /hdd3. The default binaries and settings were stored on /hdd1 which was a read-only filesystem. All the applications were installed to /hdd2 and the remaining /hdd3 was used for data. On the C3100, the content of /hdd1 has moved to the rootfs and /hdd2 has moved to /home. Those two partitions (/hdd1 and /hdd2) are now about 9MB in size each on the C3100 and are more or less empty and not in use. This makes /hdd3 much bigger on the C3100 compared to the C3000.
However, this in effect makes /home on C3100 equivalent to /hdd2 and /home on the C3000. There was around 400MB allocated to /hdd2 on the C3000 for installing applications. We only have 89MB on the C3100. Luckily, this 89MB is located on a jffs2 filesystem which has built-in compression so we could be able to install around 200-300MB of applications and stuff if we are lucky. Still, we will run out of space eventually. If that happens, we could uninstall some applications (such as the additional applications that came with the C3100 but weren't present on the C3000) or we could move some files to /hdd3, but be careful, /hdd3 is by default a FAT filesystem and does not support symbolic links which some applications might require. See the Filesystem section on discussion on using cramfs or ext2 loopback filesystem on /hdd3 to extend the amount of installable space. Alternatively, you can install to SD or CF card, but some applications require to be installed to non-FAT partitions so you might need to reformat them.
HDD3 Considerations
Both the C3000 and C3100 contain an internal 4GB MicroDrive which is partitioned into /hdd1, /hdd2 and /hdd3. By default, /hdd3 is formatted as a FAT filesystem so it can be shared as a USB drive when the Zaurus is connected to a computer as a USB slave and accessed from Windows. The first partition, /hdd1 is a read-only partition containing the OS images and binaries required to run and restore the Z to factory default on the C3000. On the C3100, it is an almost empty partition with a size of 9MB. It contains a file called hdimage2.tgz that has the directory structure and sample template files for hdd3. The second partition, /hdd2 is where applications get installed to on the C3000. On the C3100, it is also an empty partition with a size of 9MB. The third partition, /hdd3 is allocated the remainder of the MicroDrive and is a FAT formatted partition. It can be used to store data on files of any type, including relatively large files. Alternatively, /hdd3 could potentially also be used for applications when /hdd2 or /home is full if you apply a few modifications.
However, since the default /hdd3 is using the FAT filesystem, no symlinks can be created on it and file permissions and ownership are also not available. Thus, there are a few drawbacks with having /hdd3 as a FAT partition. You can either reformat the entire /hdd3 to linux filesystem (ext2/ext3) or repartition /hdd3 into /hdd3 and /hdd4. This leaves a smaller FAT formatted /hdd3 and additionally a /hdd4 with a linux partition.
Before repartitioning /hdd3, make sure you backup everything on it first. The dictionary files (dict1 and dict2) which are by default on /hdd3 can be found on the first two CD-ROMs that came with the Zaurus. The C3100 has a third CD-ROM which contains the files for the Contents_Files directory. However, the sd_map directory (C3100 only) does not apppear to be anywhere on the CDs so make sure you make a backup of it.
/hdd3 is usally mounted from /dev/hda3 or /dev/hdc3 depending on how you booted. If you booted with no CF card, then it will be /dev/hda3, however, if you had booted with a CF card inserted, then it will be /dev/hdc3.
The steps required for splitting hdd3 into two are:
- unmount hdd3
- run fdisk and delete hdd3
- run fdisk and create hdd3 as FAT
- run fdisk and create hdd4 as EXT2 or EXT3
- format hdd3 as FAT
- format hdd4 as EXT2 or EXT3
There is also a tool called parted which allows you to resize your existing partitions without having to remove them. This is certainly very useful tool, but remember to backup your hdd3 before resizing it if you have files on hdd3 that you want to keep. Although parted can resize the partition without wiping your data, it is not guaranteed. There may be instances where resizing could corrupt the partition so its always wise to do a backup first. Also run fsck after using parted to verify that the partition has been resized successfully without corruption.
Once that is done you need to remount / as read/write and create a mount point for hdd4, ie /hdd4. Remember to remount / to read-only after you have created your mount point. Also you will need to create a startup script to mount hdd4 during bootup. But be careful since hdd4 can boot up as /dev/hda4 or /dev/hdc4 depending on whether a CF card is inserted during bootup or not. My automounter package [automounter-c3000_0.5.0_arm.ipk] will automatically mount hdd4 if it detects it.
Alternatively, if you don't need your Zaurus to act like a USB drive, or your PC runs Linux, then you could just reformat the entire /hdd3 to linux filesystem.
You might also consider creating a small swap partition while you are at it. A swap partition is faster than a swapfile. A swap partition between 64MB and 256MB should be fine depending on your usage and applications.
Also note that the default installer tool (qinstaller) won't let you install applications to either /hdd3 or /hdd4. ipkg will allow you to install to those locations but won't relink the applications for you, so you will have to use ipkg-link afterwards which is not included with the default Sharp ROM. My xipk script which is part of my ipktools package enables you to install to /hdd3 and/or /hdd4, and also relinks the files and directories for you. In addition, it uses the same mechanism as qinstaller and thus applications installed with xipk can be uninstalled using the qinstaller.
If you want to maximise the space on hdd3 and you don't care about the Japane se/English dictionary and translator, then you could remove the dictionary files under /hdd3/dict1 and /hdd3/dict2. If you later decide that you do want them, simply copy them back from the CD-ROM (so don't loose your CD-ROMs). On the C3100, there is additionally the MobileMap application which has some files under /hdd3/Documents/sd_map. You can uninstall the application and remove the sd_map directory to get more space. You can re-install MobileMap from the first CD, and find the contents of sd_map under X:/Applications/MobileMapData/sd_map. The MobileMapData part is in katakana. There is also the Contents_Files directory containing many Japanese books and reading material on the C3100. If you don't know Japanese, you probably want to hide the Contents tab. This can be done though the Appearance tool under the Settings tab. You probably also want to remove the /hdd3/Documents/Contents_Files directory afterwards as well. If you ever want it back, you can simply copy it from the third CD.
Lastly, /hdd3 gets wiped when you do a factory reset, but you can disable that behaviour. To do that you need to first remount / as rw and then modify /root/etc/rc.d/rc.rofilesys and comment out the following section:
if [ "$HDDCLEAR" = "YES" ]; then
       dd if=/dev/zero of=/dev/${IDE1}3 > /dev/null 2> /dev/nulls
fi
mkfs.vfat -F 32 /dev/${IDE1}3 2> /dev/null > /dev/null
|
Of course, after you do a factory reset, you will need to fix rc.rofilesys again so the next time you do a reset it won't wipe your hdd3. Alternatively, you could also update .home_default.tar and replace the rc.rofilesys in there with the hacked version and not worry about it anymore.
On the C3100, /hdd1 and /hdd2 doesn't contain anything important and are a waste of space because those partitions are not really used except for factory reset to wipe /hdd3 which sux anyway. Thus you can hack rc.rofilesys to not even mount them or you could resize the partitions so that /hdd1 is a swap partition, /hdd2 is a linux filesystem (instead of /hdd4) and /hdd3 becomes a smaller fat partition.
Here is the default partition table:
|
Disk /dev/hda: 4095 MB, 4095737856 bytes 16 heads, 63 sectors/track, 7936 cylinders Units = cylinders of 1008 * 512 = 516096 bytes Device Start End Blocks ID System /dev/hda1 1 20 10048+ 83 Linux /dev/hda2 21 40 10080 83 Linux /dev/hda3 41 7936 3979584 c Win95 FAT32 (LBA) |
Here is my custom partition table which has /hdd1 as a 256MB swap partition, a 1.2GB ext3 partition on /hdd2 and a 2.5GB on /hdd3:
|
Disk /dev/hda: 4095 MB, 4095737856 bytes 16 heads, 63 sectors/track, 7936 cylinders Units = cylinders of 1008 * 512 = 516096 bytes Device Boot Start End Blocks Id System /dev/hda1 1 256 128992+ 82 Linux swap /dev/hda2 257 2790 1277136 83 Linux /dev/hda3 2791 7935 2593080 c Win95 FAT32 (LBA) |
In order to do this, you need to replace /root/etc/rc.d/rc.rofilesys after you have remounted / as rw. You also need to remove the NotAvailable file from the unmounted /hdd1 and /hdd2.
I have successfully used parted to shrink /hdd3 dynamically without destroying my existing files but backing up the files is still recommended just in case. Then I used fdisk to recreate /hdd1 and /hdd2 with their new sizes and formatted them using mkswap and mk2fs -j respectively.
Now when the C3100 boots up, it automatically mounts /hdd3 as before but it won't erase /hdd3 on a factory reset, and it also mounts /hdd2 as ext3 if it exists. Additionally, it also enables the 256MB swap partition (formerly /hdd1) and mounts tmpfs as 2MB instead of 1MB.
MicroDrive Performance
The C3000 and the C3100 both have a 4 GB CF MicroDrive internally, which is used as its harddisk to store data. Since a CF Flash card is generally faster than a MicroDrive, it would make the Zaurus faster if the CF MicroDrive is replaced with a CF Flash card. This makes sense for the C3000 where the applications and binaries are stored on the MicroDrive and there is a slight delay for the MicroDrive to spin up when it has gone into powersaving mode after some time of disk inactivity. However, for the C3100 it would not make such a big impact on application performance since they actually are on the flash memory instead of the MicroDrive. Still, if the application is also stored on the MicroDrive, ie /hdd3 is used for installing additional applications such as PocketWorkstation and a large swapfile, then it would make sense too.
To do this, you would need a CF Flash card to replace the MicroDrive with. Make sure the Flash card you are using has a similar capacity to the MicroDrive (4GB would be good, 2 GB is managable and bigger ones should be better). However, make sure the Flash card you are using is faster than the current MicroDrive inside the Zaurus (the Z has a 4GB Hitachi MicroDrive inside), otherwise you won't be gaining anything.
What you want to do is mirror the 4GB MicroDrive to the Flash card. You can d o this by inserting the Flash into the CF slot on the Zaurus and partition it ex actly like the MicroDrive using fdisk. Then use the dd command to copy each partition, ie hdd1, hdd2 and hdd3. Unmount hdd2 and hdd3 before you copy them or remount them to read-only. The other partitions are located in the internal flash memory (also called Nand). Alternatively, you can also use parted to copy the entire partition from one disk to another. Once this is done, you can open up your Z and swap the two drives. This will void your warranty, so make sure you understand and know what you are doing. It is your own responsibility if you break your Zaurus or any parts of it. Finding replacement parts will be extremely difficult unless you live in Japan, so be careful and consider the consequences of your actions, or modifications. Let me say it again. If you open your Zaurus up to replace parts, you void your warranty. If you break something during the process, then you are on your own since you just voided your warranty.
Zaurus Backup
You should always backup your system since that is the only way to recover if something goes wrong.
![[screenshot of backuptool]](http://www.users.on.net/%7Ehluc/myZaurus/screenshots/sc-backup.jpg)
The C3000 and C3100 come with a backup and restore tool which is located under the Settings tab. Use this application to backup your Zaurus. It allows you to backup your system (flash, applications and configurations) to either SD, CF or /hdd3. Basically, everything except /hdd3, /hdd1, /root and /mnt will be backed up and can be restored which means you will need to backup /hdd3 by other means. Before you backup, make sure you unmount any loop devices that are mounted, unless they are mounted under /mnt, otherwise they will be backed up as well (which you think might be great) but you won't be able to restore the backup image (because the additionally backed up files on the loop device(s) will make the backup image bigger than the backed up partitions). If you have automounter installed, you can unmount all the loop devices by running the following:
|
# su # automounter stop |
Once you have backed up all the files on your Zaurus, you can remount all the loop devices by running the following:
|
# su # automounter start |
Since /hdd3 is quite large, you either need to get a big CF card, or mount a Samba or USB drive that has enough space to hold your data. A USB drive would be the best (cheaper than CF drive and faster than Samba since its connected directly and not over a network unless you have got a fast network).
Assuming you have your USB disk mounted as /mnt/usbdisk1 you could do the following to backup /hdd3:
|
# tar cf - /hdd3 | gzip - > /mnt/usbdisk1/hdd3-backup.tgz |
If you are paranoid you can backup /hdd1, /hdd2 and /home as well:
|
# tar cf - /hdd1 | gzip - > /mnt/usbdisk1/hdd1-backup.tgz # tar cf - /hdd2 | gzip - > /mnt/usbdisk1/hdd2-backup.tgz # tar cf - /home | gzip - > /mnt/usbdisk1/home-backup.tgz # tar cf - /root | gzip - > /mnt/usbdisk1/root-backup.tgz # tar cf - /mnt | gzip - > /mnt/usbdisk1/mnt-backup.tgz |
The Zaurus backup tool basically shuts down Qtopia so all open files are closed and then tars up /hdd2 and /home which become the backup image. This is much safer than the above approach while Qtopia is still running. You should, however, gzip the backup image to save some space. There is no real need to backup /hdd1 each time since it is a read-only partition and does not change unless you have changed something on it manually or applied an update via flashing.
I have written a script called hdbackup which will backup /hdd3 by archiving and compressing each directory separately and datestamping them so regular backups can be made by simply running a single command.
Alternatively, you can connect your Zaurus to your Windows PC through the USB link cable and use Windows backup software or anything else you like to backup the USB drive that the Zaurus is recognised as. Since the USB PC connection is buggy, you might be better of enabling Samba and then backup /hdd3 over the network or USB cable.
Lastly,don't forget about backing up your SD and CF card also. They can get corrupted or fail without warning as well, so make sure you back them up to.
In addition, there is also a NAND backup feature in the Zaurus Diagnostic Menu which allows you to backup the entire NAND. Since the C3000 only has 16MB of NAND flash and everything actually sits on the hdd3, doing a NAND backup won't buy you much. On the C3100, however, everything is on the NAND except for the data on /hdd3, thus making a NAND backup for the C3100 gives you a reliable system image which you can use to restore your C3100 if you really mess it up. The same is not the case with the C3000 so be very careful with what you flash your C3000 with.
To do a Nand Backup, you need a CF or SD card which can hold the entire Nand. A 256MB card should be sufficient. To do a Nand Backup or Restore, do the following:
- Turn off or suspend the Z
- Unplug the Z and take out the battery
- Press and hold the D and M keys simultaneously
- Plug in the power
- The Maintenance Menu should appear in a few seconds
- Go to the third page in the menu
- Select either Nand Backup or Restore
- When finished turn off the Z
- Put battery back in and start Z
Zaurus Restoration/Recovery
If you manage to corrupt your Zaurus configuration so badly that you cannot boot it anymore or things just don't work any more, then you have several options to fix it.
- Factory Reset
If you really messed up and just start over again without retaining anything, then just do a factory reset and the Zaurus will revert to its initial Japanese ROM state.
- Restore From Backup
If you have a backup, you can restore your previous settings contained in your backup files. If you had to factory reset, then a restore can quickly get you to where you were before.
- Command Line Recovery
This is by far the most advanced option. Use this to recover files that might not have been backed up yet before doing a restore and/or factory reset.
Please refer to Trisoft's C3000 manual on how to do the above. It would be a waste of my time to provide step by step instructions since they have it pretty much covered, and they even have emergency backup images for you to use in case you dont't have a system backup.
If you have booted into the console for recovery, then you are using the /dev/mtdblock1 partition. This is the emergency partition that you usually don't see. You will need to manually mount the usual partitions if you want to access them. /home is /dev/mtdblock3 and /dev/mtdblock2 is your root partition. Don't forget to unmount the partitions after you have finished your changes or they will be rolled back and all the files remain unchanged.
Zaurus ROM Update
For the C3000, you should update your Sharp ROM to 1.11JP if you are still on 1.01JP
There is no updated Sharp ROM for the C3100 yet.
- Put card_update_3000111.exe onto a Windows machine (you got one of those right?) and run it to extract the files. (it's a self extracting zip file).
- Then copy all the extracted files to a SD or CF card (if your windows box has no card reader, then put the memory card into your Zaurus and connect it via USB cable and switch it to share your card instead of your hdd so you can transfer the files directly to the card). Make sure you put the files into the card's root directory, ie don't put them into any folder and don't copy the folder they were in.
- The following files should be on the root of your memory card:
- initrd.bin(about 4,337KB)
- zImage.bin(about 1,264KB)
- mversion.bin(about 16KB)
- updater.sh(about 7KB)
- hdimage1.tgz(about 19,734KB)
- Turn off your Zaurus and disconnect the power cable (and any other cables). Unlock the battery compartment and press the little reset button with your stylus. Put the lid back on and make sure to lock it again.
- Now make sure your Zaurus is plugged in to the AC power. You don't want to be on battery power and have your Zaurus run out of juice in the middle of the update process (you can kiss your Zaurus goodbye if that happens). Also make sure your card with the update files is inserted.
- The charge indicator should be orange now. Hold the "OK" key on the keyboard or the back of the Zaurus and turn on the device with the "On/Off" button.
- You should see the maintenance menu and select option 4 to update/flash the ROM. On the next screen, select either 1. CF or 2. SD depending on where your update files are. Now confirm to proceed with the update by selecting Y. Wait about 5 minutes after which your Zaurus should reboot. You're done. You should have 1.11 JP ROM now.
Warning: Only flash your Zaurus with a ROM intended for your specific model and make sure you downloaded the complete files. Never ever flash your Zaurus with a ROM for another model. It will cause you many sleepless nights trying to restore it to a working condition.
Zaurus Kernel Replacement
There are several replacement kernels for the C3000 and C3100 which enhance the stock kernel that ships with Sharp's ROM. You can even build your own if you want (and know how to). The kernel source is available on Sharp's developer website. However, there are some smart people who already build and tested their own enhanced kernels. One of those is Tetsu's special kernel which has been build for optimised speed and also includes iptables and bluetooth modules. It also makes the battery status more accurate and it has a few bug fixes too.
Warning: The kernel is an important part of the Linux OS. A bad kernel can corrupt your Zaurus, so don't play around with it unless you know what you are doing and install the correct kernel for your model.
- Download and place the files onto a CF or SD card.
- Turn off your Zaurus. (suspend it).
- Unlock the battery compartment and push the little reset button.
- Put the lid back on and lock it again.
- Plug your Zaurus into the AC power.
- Hold the "OK" key on the keyboard or the back of the Zaurus and turn on the device with the "On/Off" button.
- You should see the maintenance menu and select option 4 to update/flash the ROM.
- Select either 1. CF or 2. SD depending on where your update files are.
- Confirm to proceed with the update by selecting Y.
- Reset your Zaurus (press the little reset button inside the battery compartment and then press the "On" key).
- Install the kernel module ipk file that came with the kernel.
Zaurus Maintenance
fsck needs to be run on the Linux filesystems from time to time to check for inconsistencies in the file systems and to fix it if there are any. fsck is similar to the chkdsk or scandisk command in DOS and Windows.
Running fsck on a mounted filesystem is not recommended so the safest way to run it on the C3000 is from the maintenance menu. Unmounting the partitions on the MicroDrive is much easier on the C3100 since it runs off the flash instead of the disk. For FAT partitions, ie /hdd3, use fsck.vfat instead of fsck.
To perform fsck via the maintenance menu do the following:
- Shutdown Zaurus
- Remove battery lid and press the reset button
- Put battery lid back on and lock battery compartment
- Plug the power cable in
- Hold OK button and turn Z on
- Select Option 2 (data check)
- Select Option 2 (run fsck)
- Confirm (left option)
- Wait for fsck to finish
- Restart Zaurus (using the reset key inside the battery compartment)
The fsck from the Maintenance Menu checks all three partitions on the MicroDrive, ie /hdd1, /hdd2 and /hdd3. It does not fsck /home or /root which is located on Flash. In fact, there is currently no known way of fscking a jffs2 filesystem which /home and /root are formatted as.
You should also regularly fsck your SD and CF card. Please unmount them before fscking them. Here is how you would fsck a FAT formatted SD card:
|
# su # umount /mnt/card # fsck.vfat /dev/mmcda1 # mount /mnt/card |
Zaurus Networking
Configuring a Wireless CF adaptor:
Enabling the wireless network was amazingly easy and straightforward. Just plug in the Wireless CF card and the Zaurus automatically detects it. Then run the Network config applet and enter the network info and press connect. Voila! That's it. Way too easy. This was the case using a Netgear MA701 CF Wifi card. Not all CF Wifi cards are supported so your milage may vary depending on your card.
![[screenshot of netconf]](http://www.users.on.net/%7Ehluc/myZaurus/screenshots/sc-netconf02.jpg)
However, you can also manually configure the network without using the Network config applet. The config files it generates are located under /home/zaurus/Applications/Network/modules and are called WLANx.conf. You will also need to edit the corresponding entry in /etc/pcmcia/wlan-ng.opts. If for any reason the applet won't let you enter a value you want (such as space in ssid), then you can edit the mentioned config files yourself.
Enabling a USB LAN adaptor:
Now this one was a bit trickier. My USB LAN adaptor came with a Linux driver, a file called rtl8150.c and all that was required was to compile it on the Zaurus (provided you got gcc to work). Anyway, I cheated and googled for rtl8150-1.o and found it :)
Next I had to install this driver which was quite easy. All that was required was to drop it into the following location: /lib/modules/2.4.20/kernel/drivers/usb/net and the hotplug mechanism in Linux would detect whenever the device was connected and enable eth0.
Now came the slightly harder part, ie the automatic configuration of the device. The network applet seems to only work for the CF based cards so it completely ignored eth0 because it came from the USB interface. After looking at how the usbdnet and wlan is configured by the hotplug mechanism, I extended the net.agent to check for eth0 as well and added net.func and net.conf to automatically configure the network once the cable was plugged in.
In addition I also wrote a script called net to change the stored network settings so I can easily switch between networks. The configuration for net are stored under /etc/sysconfig/netconf and net is invoked with the name of one of the config files as the parameter. Proxy settings for the Zaurus are stored under /home/zaurus/Applications/Network/modules/Proxies.conf which net will automatically update depending on the config being loaded.
|
# su # cp /home/zaurus/Documents/custom/rtl8150-1.o /lib/modules/2.4.20/kernel/drivers/usb/net # cp /home/zaurus/Documents/custom/net /usr/bin # cp /home/zaurus/Documents/custom/net.* /etc/hotplug # mkdir /etc/sysconfig/netconf # cp /home/zaurus/Documents/custom/*.conf /etc/sysconfig/netconf for example: # net dhcp (loads the config file dhcp.conf)# net -gui (starts with opie shell in QTopia desktop) # net -refresh (tells NetFront that its connected already) # net -resume (manually force network to resume) |
Here is a sample config file for a private network:
|
DHCPC=no IP=192.168.1.2 NETMASK=255.255.255.0 DOMAIN= GATEWAY=192.168.1.1 PROXY=0 PROXYHOST= PROXYPORT= DNS1=192.168.1.1 DNS2= |
net also has a GUI front-end using opie-sh, but in order to use the GUI, sudo needs to be configured to allow zaurus user to change the network settings, ie. ifconfig and dhcpcd. I also created a netswitch package [netswitch_0.4_arm.ipk] which will do the above steps when installed.
Some application such as NetFront insist on doing their own connection and disconnection to the network and ignore the fact that your USB network is already connected. As a workaround net has a refresh option to reset the network status whenever those programs mess with it. Simply run the following after you have launched NetFront:
|
# net refresh |
A lot of the USB network cards use either the rtl8150 chipset or are compatible with the pegasus driver. Drivers for both are included with netswitch, so installing the netswitch package should enable your USB LAN device in most cases. However, some network cards use other chipsets. You should be able to compile your own driver if you can find the driver source. See gcc section for further details.
Using the advanced USB sync:
The USB sync cable which allows you to access your Zaurus as a USB disk can also be used in TCP/IP mode which means you could use that cable to network your Zaurus and your PC.
To do this, you first need to install the USB NDIS drivers onto your PC or laptop. The Zaurus Software for the PC (Windows) does not use UniCode and hence displays garbage when run on an English version of Windows (even if you have installed the Japanese language pack and your browser can display Japanese websites without problems). To fix this, change the default Windows system locale to Japanese and restart Windows. Then run X:\PCSOFT\Setup.exe from the Zaurus CD-ROM and you will be able to read the Japanese.
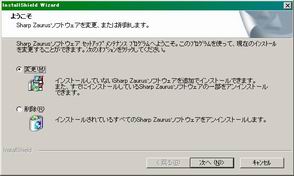
Select next as appropriate and use the following as guide for the options:
- Intellisync for Zaurus
- Backup/Restore
- Zaurus Shot
- Zaurus Drivers (Network)
(you only need the last option for the USB network)

Restart Windows when the install has finished.
The USB network driver is now installed and Zaurus Manager should had started automatically. If it has not, start it manually by running "C:\Program Files\Common Files\Sharp\SL\SSPCLINK2\ComSet.exe". You should also make a copy of C:\Program Files\Sharp Zaurus 2\drivers, best is to zip up the whole directory. This is the Zaurus USB network driver. You can use this driver to re-install the USB network or install it to another machine without having to run through the whole setup process again.
Rather than carrying a floppy, CD-ROM or another USB stick around that contains the Zaurus NDIS USB driver, you could put it on /hdd3/Documents on the Zaurus itself. When you connect your Zaurus to a computer which has not been setup with the Zaurus NDIS USB driver before, it will detect the Zaurus as a plain USB storage device and allow you to copy the driver from the Zaurus. Then once you installed the driver to the computer, it will believe that it is connected to the Zaurus via a network instead of treating the Zaurus as a dumb USB disk (provided the Zaurus is in advanced USB mode).
![[screenshot of pclink]](http://www.users.on.net/%7Ehluc/myZaurus/screenshots/sc-pclink.jpg)
Now, on to the Zaurus side of the configuration. Run the PC Link tool from the Settings tab and select PC Link Setting, then select Connection USB-TCP/IP (advanced). Now just connect the USB cable (USB mini-B into Zaurus, USB A into Laptop or PC). The Windows machine should detect a new device at this point, a SL series Ver3 (NDIS 5) network adaptor, and you should be able to configure it. By default, the Zaurus would be assigned an IP address of 192.168.129.201. Assign an IP address in the same range to this new network adaptor, eg 192.168.129.101. You should now be able to ping both ways unless you have a firewall blocking it or DDE service is not enabled. If you want the Zaurus to be able to access the internet as well, you could enable internet sharing on your Windows PC (assuming it has internet connectivity and you trust Microsoft security). If you do that, Windows will reset the IP address of your Zaurus NDIS driver to 192.168.0.1 but you can change it back to whatever value you had given it before, ie 192.168.129.101
On the Zaurus side, you need to run the following commands to setup a route to your windows box:
|
# su # route add -host 192.168.129.101 usbd0 # route delete -net 192.168.129.0/24 usbd0 # route add default gw 192.168.129.101 |
Now that the route is configured, you should be able to ping servers by their IP addresses. In order to resolve the hostnames, you need to configure /etc/resolv.conf on your Zaurus with the DNS that is used on your Windows box. Assuming your DNS is 192.168.10.1, do the following:
|
# echo "nameserver 192.168.10.1" > /etc/resolv.conf |
You can also automate the above on the Zaurus by modifying /etc/hotplug/usbd.func and adding the following to the end of the usbd_net_if_up() function
        if [ "$DHCPC" = "no" ]; then
          GATEWAY=192.168.129.101
          DNS=192.168.10.1
          route add -host $GATEWAY usbd0
          route delete -net `echo $GATEWAY|cut -d. -f1,2,3`.0/24 usbd0
          route delete default
          route add default gw $GATEWAY
          echo "nameserver $DNS" > /etc/resolv.conf
        fi
|
Using IrDa for networking:
Since the Zaurus has an infra-red port (IrDA), you can use it for networking as well provided you also have an IrDA port on your PC or laptop that you can configure to use PPP over IrDA (IrCOMM or IrNet). This method of networking your Zaurus would give you the slowest network speed and you usually would not use it if the other options were available to you. But if your CF slot and USB port are tied up with other things, then using IrDA for networking might be something viable.
For this to work, you would need to first choose whether to use IrCOMM or IrNet drivers. Then you would need to make sure the chosen driver is enabled on both your Zaurus and your PC or Laptop. For IrDA connectivity, one machine has to be the host and the other the client. I will describe how to make Zaurus the host and the other PC or Laptop the client. The roles can also be easily reversed. I also did not bother with security since both machines would have to be physically in close range to each other in order for this to work.
IrCOMM
The IrCOMM driver is by default already installed on the Zaurus and most Linux machines that have IrDA enabled. However, you would need to install a driver for Windows. On Windows 2000, for example, you will need to disable Image Transfer and install an IrCOMM driver (IrCOM2k). The following site describes how to setup IrCOMM on Windows2000: http://www.stud.uni-hannover.de/~kiszka/IrCOMM2k/English/manual.html. Once you have installed the IrCOMM driver, you can setup a new network connection (Direct Connection) using IrDA as the device and setting up Windows as the client with no password prompt.
On the Zaurus, you will need to do the following to make it start IrDA as the host:
|
# su # /etc/rc.d/init.d/irda start # pppd /dev/ircomm 9600 10.10.10.21:10.10.10.20 local noauth nodetach |
On the IrDA client, if you are running Linux (and IrCOMM is already setup), you can simply do the following:
|
# su # /etc/rc.d/init.d/irda start # pppd /dev/ircomm 9600 nodetach |
If you are running Windows (and you have setup the direct connection using IrDA as client) you can simply double click on the Direct Connection icon to connect.
Once they are paired successfully, you can ping the other box from the Zaurus as 10.10.10.20. The Zaurus would be 10.10.10.21 in this example.
To stop IrCOMM, simply press Fn + c and then run /etc/rc.d/init.d/irda stop
IrNet
You will need the IrNet module on the Zaurus and your other Linux box. However, it is already installed on Windows 2000 so all you need to do on Windows is to create a new Direct Connection using IrDA interface.
To install and enable IrNet on the Zaurus, you will need to copy irnet.o to /lib/modules/2.4.20/kernel/net/irda/irnet.
|
# su # mkdir -p /lib/modules/2.4.20/kernel/net/irda/irnet # cp irnet.o /lib/modules/2.4.20/kernel/net/irda/irnet # mknod /dev/irnet c 10 187 # chown root:root /dev/irnet # chmod 644 /dev/irnet # insmod irnet # /etc/rc.d/init.d/irda start # pppd /dev/irnet 9600 10.10.10.21:10.10.10.20 local noauth nodetach |
On the IrDA client, if you are running Linux (and IrNet is already setup), you can simply do the following:
|
# su # /etc/rc.d/init.d/irda start # pppd /dev/irnet 9600 nodetach |
If you are running Windows (and you have setup the direct connection using IrDA as client) you can simply double click on the Direct Connection icon to connect.
Once they are paired successfully, you can ping the other box from the Zaurus as 10.10.10.20. The Zaurus would be 10.10.10.21 in this example.
You can also just simply install irnet_2.4.20_arm.ipk which installs and configures irnet so that it will be available even after a reboot. It also provides an opie shell script to allow you to start and stop it from the Qtopia GUI or simply run irnet start to start it from the command line and irnet stop to stop it.
Using Bluetooth for networking:
If you have a CF bluetooth card or a bluetooth USB dongle, then you can set up a PAN (Personal Area Network) with other bluetooth enabled devices.
![[screenshot of netconf]](http://www.users.on.net/%7Ehluc/myZaurus/screenshots/sc-pan.jpg)
In the case you have a bluetooth enabled mobile phone with GPRS service, then you can even use bluetooth to connect to your phone using dialup networking (DUN) to use the phone's GPRS service.
![[screenshot of netconf]](http://www.users.on.net/%7Ehluc/myZaurus/screenshots/sc-dun.jpg)
However, the default Sharp ROM does not have bluetooth drivers or tools installed out of the box and you will need to setup and install those first before you can use bluetooth. See the bluetooth section for more details.
File Sharing and Services
Enabling Samba (over wireless or ethernet)
By default, a Samba service is already installed on the Zaurus. It is used when you synchronise your Zaurus with your PC while the USB cable is plugged in. You can also manually start and stop the Samba service and allow it to go over your wireless and ethernet network instead of just the USB cable. If you use the USB cable in advanced mode (with TCP/IP enabled), then you will be able to access all your devices (MicroDrive, SD card, CF card and USB disk) at the same time instead of being able to only chose one at a time in normal sync mode.
To allow Samba to be accessed via the WLAN (wlan0, wifi0) or LAN (eth0) interface, edit the following file: /usr/lib/samba/smb.conf
Find the following line: interfaces = usbd0
add your network interface after usbd0 separated by a space like this: interface = usbd0 wlan0 eth0
You might also want to add a new entry: hosts allow = 192.168.1. (whatever the IP range of your network is from which you want to connect to your Zaurus, multiple entries are separated with a space)
[global] workgroup = HOME log file = /dev/null hosts allow = 192.168.1. 192.168.129. encrypt passwords = yes coding system = utf8 client code page = 932 force create mode = 0755 strict sync = yes sync always = yes interfaces = usbd0 eth0 wlan0 #wins support = yes bind interfaces only = yes [system] comment = System Folder path = /root/samba read only = no browseable = no guest ok = yes force user = root [home] comment = for User Data path = /home/samba short preserve case = no read only = no guest ok = yes force user = zaurus |
And finally, you need to know how to start the Samba service:
|
# su # /etc/rc.d/init.d/samba start |
To stop the Samba service:
|
# su # /etc/rc.d/init.d/samba stop |
Alternatively, you can install sambacontroller [sambacontroller_0.1-0_arm.ipk] which gives you a GUI interface to do it. Remember to give it root access or else nothing will happen. Also you need to do the following to enable it to configure smb.conf (only needed for the C3000)
|
# su # mkdir -p /home/root/usr/lib/samba # cd /home/root/usr/lib/samba # ln -s /usr/lib/samba/smb.conf smb.conf |
Once you install SambaController, you can use it to start and stop samba, as well as modify smb.conf from the Configure tab.
![[screenshot of samba]](http://www.users.on.net/%7Ehluc/myZaurus/screenshots/sc-samba.jpg)
You should also install smbpasswd [smbpasswd_0.1-1_arm.ipk] which will allow you to set the samba password.
Once you installed smbpasswd, you will need to do the following to get it working:
|
# su # ln -s /usr/local/samba/lib/codepages /usr/lib/samba/codepages # rm /usr/local/samba/lib/smb.conf # ln -s /usr/local/samba/lib/smb.conf /usr/lib/samba/smb.conf # ln -s /usr/local/samba/private/smbpasswd /etc/smbpasswd |
Note: you might need to hack the Windows registry to enable plain text password to make Windows compatible with Samba (depends on the version of Windows you are running).
This configuration forces the samba user to be the zaurus. When giving access to the samba shares, all the access rights and file permission is that of the zaurus user. This will work fine on all FAT filesystems, however, if you change some of your partitions to ext2, then you might get some permission denied errors when trying to acces, create, modify, move or delete files. If that happens, make sure the file or directory in question has sufficient access rights for the zaurus user.
In addition, if you change /hdd3 to another filesystem other than fat, then samba will stop to work for /hdd3/Documents unless you change /etc/hotplug/usbdstorage.agent and change the mount options to the appropriate filesystem type, ie change fat to someting else like ext3.
Installing SSH
ssh client
If you only want to ssh to other machines from your Zaurus, install ssh client [openssh-client_3.6.1p1_arm.ipk].
sshd
If you want your Zaurus to be accessed via ssh as well, then you need to install the following:
- openssl - [openssl_0.9.7d_arm.ipk]
- openssh-server [openssh-server_3.6.1p1_arm.ipk]
- openssh-addon - [openssh-addon_3.6.1p1_arm.ipk]
Enabling telnet
telnet client
There already is a command line telnet client pre-installed on the Zaurus which you can use.
telnetd
In order to enable the telnet daemon within inetd, uncomment the telnet entry in /etc/inetd.conf and restart inetd.
|
Make sure you use tcp wrapper as it is slightly more secure. Then enable tcp wrapper security by creating hosts.allow and hosts.deny as follows:
|
# su # echo "ALL:ALL" > /etc/hosts.deny # echo "in.telnetd: 192.168.129., 192.168.1." >> /etc/hosts.allow |
Add any IP range you want to give access to in addition to the above.
Installing FTP
ftp client
A command line ftp client is already installed, however, there are much nicer ftp clients such as ncftp [ncftp_3.1.5-1_arm.ipk] and lftp [lftp_2.6.7-1_arm.ipk]. Alternatively, there are also GUI based ftp clients such as opie-ftp [opieftp_0.9.1-20020702_arm.ipk] and jftp [jftp_0.23.1_arm.ipk].
ftp server
If you want to serve as a ftp server then you need to install utftp [utftpd_0.2.4_arm.ipk] or troll-ftpd [troll-ftpd_1.28-cg2_arm.ipk]. Alternatively, you can ftp to port 4242 on the Zaurus which is a very basic ftp service.
Alternatively, you can also enable the ftp daemon within inetd. To do that, uncomment the ftp entry in /etc/inetd.conf and restart inetd.
|
Make sure you use tcp wrapper as it is slightly more secure. Then enable tcp wrapper security by creating hosts.allow and hosts.deny as follows:
|
# su # echo "ALL:ALL" > /etc/hosts.deny # echo "in.ftpd: 192.168.129., 192.168.1." >> /etc/hosts.allow |
Add any IP range you want to give access to in addition to the above.
Installing Web Server
Apache
There is a few things that need to be done before you can install Apache:
|
# su # mkdir -p /hdd2/ramfs/www # ln -sf /hdd2/ramfs /mnt/ramfs # ln -s /hdd2/ramfs/www /usr/local/apache |
Now we are ready to install apache [apache-1.3.27-php-4.2.3_0.1_arm.ipk]
When apache is installed you need to do the following:
|
# su # ln -s /usr/local/apache/bin /usr/local/apache/src |
(you can also fix apachectl to look at the right place instead of creating a link)
You can now start apache with the following command:
|
# su # cd /usr/local/apache/bin # ./apachectl start |
You can stop apache with the following command:
|
# su # cd /usr/local/apache/bin # ./apachectl stop |
I have also created a opie-sh script [apachegui_0.1_arm.ipk] which allows you to stop and start apache from the GUI. You will be required to configure sudo and add /usr/bin/apache to the allowed list for zaurus user (see sudo).
Alternatively, you can also install boa [boa_0.94.12_arm.ipk] which is a light-weight http daemon if you just want simple web server.
Browsers
There are several browsers available such as NetFront, Opera, Konqueror, Firefox, Minimo, Dillo, Links, ...
Installing VNC
VNC client
keypepple [opie-keypebble_1.0.0-1_arm.ipk] can be used as a vnc client to other machines or even the local one.
![[screenshot of keypebble]](http://www.users.on.net/%7Ehluc/myZaurus/screenshots/sc-keypebble01.jpg)
VNC server
fbvnc server for Qtopia
You can run a vncserver on your Zaurus to enable remote access to its desktop. However, since the available fbvnc server packages were build for other models, it does not work reliably on the C3000 and C3100.
I have build my own version of fbvncserver [fbvncserver-c3000_0.9.4-0.3_arm.ipk] which allows me to view the Zaurus desktop remotely using a vnc client such as tightvnc or using a web browser to connect to port 5800 on the Zaurus.
I also managed to get the mouse pointer working through the vnc server as well as the keyboard. However, some keys are still wrongly mapped. If you just want a read only vnc server without remote mouse and keyboard entry, then do the following to disable them:
|
# su # rm /etc/rc.d/init.d/fbvncinput # reboot |
Alternatively, you could also just restart Qtopia instead of rebooting the Zaurus. To do that instead do the following:
|
# su # /usr/local/bin/fbvncinput stop # killall qpe |
If you want to re-enable the keyboard and mouse, then just recreate the the symbolic link to fbvncinput and reboot your Zaurus:
|
# su # ln -s /usr/local/bin/fbvncinput /etc/rc.d/init.d/fbvncinput # reboot |
Alternatively, you could also just restart Qtopia instead of rebooting the Zaurus. To do that instead do the following:
|
# su # /usr/local/bin/fbvncinput start # killall qpe |
Vncserver for Debian
Vncserver is part of the Debian PocketWorkstation bundle and is intended as a loopback service to connect to the Debian instance locally. However, there is nothing preventing it from being accessed remotely as well. Vncserver listens on port 5901 and can be easily accessed through keypebble and/or tightvnc [tightvnc-1.2.9_javabin.zip]. tightvnc is a java application and can be installed on any machine that runs java. It can also be installed under a webserver such as Apache. Simply make a directory such as vnc under the document root and copy index.html and VncViewer.jar into there.
|
# mkdir -p /mnt/ramfs/www/htdocs/vnc # cp index.html /mnt/ramfs/www/htdocs/vnc # cp VncViewer.jar /mnt/ramfs/www/htdocs/vnc |
Then just point your browser at it: http://zaurus/vnc
![[screenshot of tightvnc]](http://www.users.on.net/%7Ehluc/myZaurus/screenshots/sc-tightvnc.jpg)
Mounting Filesystems
Mounting Samba shares
Install the following packages:
- libncurses - [libncurses_5.0_arm.ipk]
- smbmount - [smbmount_0.1_arm.ipk]
- smbmounter - [smbmounter_0.1-2_arm.ipk]
To mount a drive type:
| # smbmount //hostname/share /mnt/smb -o username=user |
To unmount type
| # umount /mnt/smb |
Or use the smbmounter GUI interface. Make sure you give it root access (see Run as root section). The NETBIOS name needs to be an IP address or if you provide a hostname, make sure in your /etc/hosts file on your Zaurus you have given the hostname an alias in all uppercase letters. For example if you have a hostname mylaptop mapped to an IP of 192.168.1.10 then you will need the following entry:
|
192.168.1.10 mylaptop MYLAPTOP |
Once you have created an entry with a valid share name and username/password, then you can mount and unmount the share by clicking on the appropriate buttons. If the share is valid and your username/password is correct, then the smb share will be mounted under /hdd3/Documents/NetworkFolders/hostname/sharename
Mounting USB drives
To mount a drive type:
| # mount /dev/sda1 /mnt/usbstorage |
To unmount type:
| # umount /mnt/usbstorage |
You can also create the following simple script to automatically mount USB drives or use the more advanced usb-storage that I've written. Here is the simple version:
|
Hint: Once a USB disk is mounted, it will appear in the Files tab as well. In addition, creating a link to the mounted drive from /home/samba will allow it to be shared as well through Samba. In general, most devices such as memory sticks, cameras, mp3 players and usb harddrives have their disk partitioned as a primary partition and can be found at /dev/sda1. However, if you have partitioned your disk as an extended partition, then it most likely would be /dev/sda5. Do a fdisk -l /dev/sda as root to check and change the above accordingly.
In addition, if you are using a USB Hub, then you will be able to attach and mount multiple devices, usually up to four disks. In such a case, the devices will be /dev/sda, /dev/sdb, /dev/sdc and /dev/sdd. I have created a more advanced script which can automatically mount up to four usb disks and also automount disks partitioned as primary or extended partitions. Place this usb-storage into /etc/hotplug/usb and remove usb-storage.off if there already is one (it will generate a new one). The script will also create mount points under /mnt and update /etc/fstab as required. Alternatively, you can simply install [automounter-c3000_0.5.0_arm.ipk].
In addition to external harddisk enclosures with USB interfaces and memory sticks, most MP3 players, cameras and some mobile phones also have an internal storage that can be mounted on the Zaurus if they have a USB interface. Most of those devices will be recognised by the Zaurus as a Mass Storage device by default, however, some newer devices are not on the Zaurus' device list and you will need to update it to let the Zaurus know about the new device (see SonyEricsson section for an example).
The automounter script only automatically mounts the first mountable partition. If you have multiple partitions, then you will need to manually mount the remaining partitions or modify the automounter script to also mount the remaining partitions.
The C3000 and C3100 can also read NTFS formatted USB disks. You will need to copy ntfs.o to /lib/modules/2.4.20/kernel/fs/ntfsfs/ or install [ntfs-zaurus_2.4.20_arm.ipk].
A useful applet that I wrote [qtopia-usbapplet_1.0.3_arm.ipk] can be used to unmount the USB disks prior to unplugging them without needing to go to the command line.
Mounting SD and CF cards
The SD and CF cards are automatically mounted when they are inserted. In addition to mounting and unmounting them, additional hooks and controls can be added to the scripts such as invoking /etc/rc.d/init.d/mntloop (automounter) to check for the presence of a swapfile and enabling it when the card is mounted and disabling it when the card is unmounted. The SD card is auto mounted by the /etc/sdcard/sd_mem_ctrl script and this is where the control hooks need to be added. The CF card is auto mounted by /etc/pcmcia/ide.
Furthermore, by default, the SD card script only attempts to mount the first partition. If you have multiple partitions, then you need to enhance the above mentioned script to automatically mount additional partitions on the CF or SD cards.
Remounting Filesystem as Read/Write or Read Only
Some partitions/file systems such as / cannot be unmounted. Some are also mounted as read-only. In order to modify the files on those file systems, you need to remount them as read/write and then remount them back to read-only after you have done what you wanted.
To remount as read/write:
| # mount -o rw,remount / |
To remount as read only:
| # mount -o ro,remount / |
Enabling Swap
The following demonstrates how to configure a 128MB swap file on the C3000's harddisk. Normally a swap file is not required unless you are running many X/Qt applications and doing onboard development. Most users with X/Qt will probably only require 32MB - 64MB swapfile.
|
# su # dd if=/dev/zero of=/hdd3/swapfile bs=1048576 count=128 # mkswap /hdd3/swapfile # swapon /hdd3/swapfile # echo "/hdd3/swapfile swap defaults 0 0" >> /etc/fstab |
To enable swap:
|
# su # swapon /hdd3/swapfile |
To disable swap:
|
# su # swapoff /hdd3/swapfile |
To check swap status:
|
# cat /proc/swaps |
In addition, you can install [qtopia-memoryapplet_1.0.4_arm.ipk] which allows you to monitor both your physical memory as well as your swap. It even can manage the swapfile creation for you. This version can create a swapfile with a max. of 512MB. It also gives you the option to create the swap on the internal HDD (/hdd3), CF card and SD card. The created swap file is also called swapfile rather than .swapfile.
Increasing tmp
By default /tmp is mounted from /dev/shm as a 1MB tmpfs. This 1MB is taken from the 64MB of RAM and for most applications, 1MB of tmp is sufficient. However, some applications such as kismet or qpdf2 may require a bit more than just 1MB. Opening some large pdf files for example might be very slow or does not work at all because there is insufficient space in /tmp. Some applications can utilise /home/root/tmp instead, but not all can.
You can increase the amount of memory allocated to /tmp. But remember that memory for /tmp is taken from RAM, so increasing /tmp will decrease the amount of physical available RAM.
To do that, you need to edit /etc/fstab and /root/etc/rc.d/rc.rofilesys and replace 1m with for example 2m to increase the size of /tmp to 2MB. Remember to remount / to rw before editing rc.rofilesys and remount it back to ro once done. Finally, you need to reboot the Zaurus in order for the change to take effect.
Using loopback filesystem
You can use a loopback filesystem which is a mounted filesystem image to do various things such as compressing files or overlaying a filesystem with another format.
The cram filesystem is a read only compressed filesystem format. The following demonstrates how to configure cramfs to preserve some space. Only convert directories to cramfs if you are sure those directories are read-only, ie you are never going to change or add any files there. You will need either [cramfs-1.1_arm.bin.tar.gz] or [mkcramfs.tar.gz], or install gcc which also includes it. Here is an example for compressing and mounting the jre directory:
|
# su # mkcramfs /usr/lib/jdk1.3 /hdd3/jre13.cramfs # rm -r /usr/lib/jdk1.3/* # mount -t cramfs -o loop /hdd3/jre13.cramfs /usr/lib/jdk1.3 |
So far I have crammed the following:
- /usr/lib/jdk1.3
- /usr/lib/firefox0.9gtk
- /usr/lib/thunderbird-0.6
Note that mkcramfs stores the whole image in memory before writing it to disk, so make sure you have a sufficiently sized swap file enabled before running mkcramfs.
Also, there are only 2 loop devices by default on the C3000 and C3100, but you can create more loop devices. You will need to recreate them each time you reboot, so it would be better to automate it in a start script which you can use to automatically mount the cram archives as well. Here is how you create /dev/loop2 to /dev/loop6
|
# for i in 2 3 4 5 6 > do > mknod /dev/loop$i b 7 $i > done |
You might also want to add an entry into fstab so the cramfs archives can be automatically mounted. Copy mntloop to /etc/rc.d/init.d and link it to rc5.d and rc6.d
|
# su # cp /home/zaurus/Documents/custom/mntloop /etc/rc.d/init.d # ln -s /etc/rc.d/init.d/mntloop /etc/rc.d/rc5.d/S50mnt # ln -s /etc/rc.d/init.d/mntloop /etc/rc.d/rc6.d/K50mnt # echo "/hdd3/jre13.cramfs /usr/lib/jdk1.3 cramfs loop,ro 0 0" >> /etc/fstab |
mntloop will create new loop devices and check /etc/fstab at bootup time and mount any valid entry for cramfs it finds. The Linux boot process will mount entries in /etc/fstab by default, but it can only mount 2 loop partitions because there are only that many default loop devices, so any additional entries in /etc/fstab will fail to mount. mntloop will mount any additional entries it finds after creating the extra loop devices. At system shutdown or reboot, it will cleanup and unmount anything mounted as a loop device.
The automounter package [automounter-c3000_0.5.0_arm.ipk] will install mntloop and also install the usb automounter.
Similar to the cram filesystem is the squash filesystem which is appendable, ie you can add files to it. In order to use the squash filesystem, you will need to install the squashfs module [kern-mod-squashfs_c3000-2.1-2_arm.ipk].
Alternatively, if you don't need a compressed filesystem but want a read and write access instead, then you can create an ext2 or ext3 formatted loopback filesystem. You would need to pre-allocate a chunk of space for it and the files won't be compressed at all.
For example, to create a 128MB loopback filesystem on /hdd3 called expansion.ext2 do the following:
|
# su # dd if=/dev/zero of=/hdd3/expansion.ext2 bs=1MB count=128 # echo y|/sbin/mke2fs /hdd3/expansion.ext2 # mkdir -p /home/expansion # mount -o loop -t ext2 /hdd3/expansion.ext2 /home/expansion # echo "/hdd3/expansion.ext2 /home/expansion ext2 loop,rw,noatime 0 0" >> /etc/fstab |
Alternatively, if you rather create an ext3 filesystem instead of an ext2, do the following:
|
# su # dd if=/dev/zero of=/hdd3/expansion.ext3 bs=1MB count=128 # echo y|/sbin/mke2fs -j /hdd3/expansion.ext3 # mkdir -p /home/expansion # mount -o loop -t ext3 /hdd3/expansion.ext3 /home/expansion # echo "/hdd3/expansion.ext3 /home/expansion ext3 loop,rw,noatime 0 0" >> /etc/fstab |
Now you could move all the files from /usr/local to the newly mounted loopback filesystem and then relink /usr/local to the loopback filesystem. This way, we moved some files off to hdd3 and extended the /usr/local directory to have a higher limit of 128MB. Similarly you could do something similar with /opt/QtPalmtop/share and many other directories as well. However, doing this will impact on performance a little bit. The overhead caused by the loopback filesystem and the speed of the MicroDrive are factors to consider and thus, choose files and directory that are not frequently used to be moved to the loopback filesystem.
On C3000:
|
# mkdir -p /home/expansion/usr/local # cd /usr/local # tar cvf - * | tar xvf - -C /home/expansion/usr/local # mv /hdd2/usr/local /hdd2/usr/local.bak # ln -s /home/expansion/usr/local /hdd2/usr/local |
Once you have tested that everything still works, you can remove /hdd2/usr/local.bak
On C3100:
|
# mkdir -p /home/expansion/usr/local # cd /usr/local # tar cvf - * | tar xvf - -C /home/expansion/usr/local # mv /home/root/usr/local /home/root/usr/local.bak # ln -s /home/expansion/usr/local /home/root/usr/local |
Once you have tested that everything still works, you can remove /home/root/usr/local.bak
Make sure you install the automounter package [automounter-c3000_0.5.0_arm.ipk] or else your loopback filesystem might not get automatically mounted after a reboot.
Alternatively, instead of moving files manually after they have been installed, you can also just install files to the loopback filesystem directly. The default installer won't let you do it, but my xipk install script (which is part of my ipktools package) does allow it.
By default xipk installs to /hdd3/programs, so you should mount your loopback filesystem as /hdd3/programs or change /etc/xipk.conf to contain the mount point of your loopback filesystem. Then you can do the following to install applications to hdd3:
|
# xipk ipkfile |
Enable large SD cards
The default SD/MMC driver only supports SD and MMC cards of sizes up to 1GB. Using the updated driver which is taken from the C3200, it is possible to use larger SD cards. 2GB and 4GB SD cards are recognised and can be used once this updated driver is installed.
However, some applications have 1GB or 2GB (upper limit for FAT16 partitions and maximum filesize on FAT16) hardcoded as the upper limit and thus will miscalculate the amount of free space on the larger SD card. Also, this driver is not loaded during emergency boot or the NAND loader so you cannot use the larger SD card to flash your Zaurus or do NAND backup/restore.
Also, for 4GB SD cards, be very careful when ejecting the card. If you eject it while it is still mounted or while it is being written to, then you might corrupt the integrity of the device and might not be able to use it anymore. Since it is larger, it needs more time to flush the buffers and thus this problem occurs less on smaller SD cards. If this occurs, however, even a fdisk or reformatting of the SD card won't work (the smaller SD cards can be reformatted in some digital cameras but not many cameras can recognise the larger SD cards either so you cannot use them to reformat a broken SD card). To prevent this from happening in which case you need to claim a warranty replacement so make sure you got proper warranty when you purchase large SD cards, you can change the SD mount options to mount the SD card with the sync option and also increase the wait delay from 1 second to 3 or 5 seconds during the SD unmount process.
To make the SD card mount with the sync option, modify /etc/sdcard/sd_mem_ctrl change the following from
|
FATOPTS="-o noatime,umask=000,iocharset=utf8" OPTS="-o noatime" |
to the following
|
FATOPTS="-o noatime,umask=000,iocharset=utf8,sync" OPTS="-o noatime,sync" |
To increase the wait delay during the SD unmount, modify /etc/sdcontrol and change the following from
|
sleep 1 |
to the following
|
sleep 3 |
Enabling IrDa
The Zaurus has an IrDa port build-in, but for security and power saving, it is disabled by default. You can temporarily enable it to receive files. Use the IR-Receive tool under the Settings tab and enable it to receive files. You should disable it once you finished receiving files.
![[screenshot of beam receive]](http://www.users.on.net/%7Ehluc/myZaurus/screenshots/sc-beam.jpg)
You can also send files via IrDa. For that, select the file you want to beam from the Files Tab and hold the stylus on it for a few seconds and select Send by beam.... I have tested this feature and it works fine to send and receive files to my Laptop (Toshiba Libretto 50CT) and Mobile phone (Sony Ericsson K750i).
![[screenshot of beam send]](http://www.users.on.net/%7Ehluc/myZaurus/screenshots/sc-sendbeam.jpg)
Enabling Bluetooth
The stock Sharp ROM does not come with bluetooth enabled. You can add bluetooth capability to the Zaurus by either using a CF Bluetooth card or a USB Bluetooth dongle. I've tested this using a Socket Bluetooth CF card which I think is great because it is exactly the same size as a CF memory card. It has a CF I form factor and no bits sticking out when inserted into the CF slot on the Zaurus. I have also tested this with a tiny WIDCOMM compatible USB Bluetooth dongle.
In order to enable and use Bluetooth, you need to install a bluetooth stack such as bluez which includes the required kernel modules as well as needed command line tools. You can also add some plugins to the graphical Network config tool to enhance it to handle bluetooth connection types. There are currently two such plugins available, one for PAN (Personal Area Network) and one for DUN (dial up bluetooth). Once they are installed, you will see additional options in your Network config tool.
Here are the files you need:
- bluez-zaurus_2.12_2.4.20_alpha4_arm.ipk
- bluepin_0.0.1-1_arm.ipk
- susp_resume_bluez_0.9.3_arm.ipk
- qtopia-bluetoothnetworkapplet_1.0.1_arm.ipk
- qtopia-pannetworkapplet_1.0.1_arm.ipk
The bluez package is essential while the others are optioanl. If you find newer updated versions of those, then use them instead. Once you have installed the above packages, you can begin to setup and configure your bluetooth stack. I have also created a single package [bluetooth-support_1.23_arm.ipk] which contains the above as well as additional obex packages. There is also a bluetooth lite package which only contains the GUI scripts. The qshdlg package needs to be installed to use the bluetooth GUI.
The first thing you need to do is check your config and make sure your bluetooth stack has initialised successfully.
|
# su # /etc/rc.d/init.d/bluetooth restart # hciconfig |
You will see something like this:
hci0: Type: UART
UP RUNNING PSCAN ISCAN RX bytes:250 acl:0 sco:0 events:12 errors:0 TX bytes:446 acl:0 sco:0 commands:12 errors:0 |
Then you need to search for bluetooth enabled devices you want to use and do the pairing.
|
# hcitool scan |
Note that unless the other bluetooth devices are configured to be visible, you won't be able to find them. Write down their mac addresses. (xx:xx:xx:xx:xx:xx is the format for the mac addresses and each device will have a unique address), eg:
|
xx:xx:xx:xx:xx:xx K750i xx:xx:xx:xx:xx:xx OQOU1 xx:xx:xx:xx:xx:xx C3000 |
To find out the capabilities of those devices do the following with their corresponding mac address:
|
# sdptool browse xx:xx:xx:xx:xx:xx |
You can initiate the pairing from each of those devices and make sure the PIN matches. The Zaurus stores its PIN in /etc/bluetooth/getpin and /etc/bluetooth/pin
/etc/bluetooth/pin contains the pin number that you enter in any other Bluetooth device that pairs with the Zaurus.
/etc/bluetooth/givepin contains the pin number that your Zaurus will automatically give to another Bluetooth device if pairing from the Zaurus. givepin is a script which must print out a string of the format "PIN:1234" where 1234 is the pin number, so you only change that part of the script to change to pin number.
Once the devices are paired with your Zaurus and you have determined what capabilities they have, you can setup and configure your Zaurus to use them.
![[screenshot of bluetooth GUI]](http://www.users.on.net/%7Ehluc/myZaurus/screenshots/sc-bluegue.jpg)
The bluetooth qshdlg GUI or the network config tools plugins can be used to configure the following.
![[screenshot of bluetooth GUI]](http://www.users.on.net/%7Ehluc/myZaurus/screenshots/sc-blue2.jpg)
Setting up a bluetooth PAN (Personal Area Network)
A PAN allows you to access services on the other bluetooth enabled devices like on a small network with TCP/IP connectivity. This requires that the other devices, usually bluetooth enabled computers, provide services such as Samba, FTP, HTTP, Telnet, SSH/SCP, etc.
On your Zaurus do the following:
|
# su # modprobe bnep # pand --role PANU --service NAP --connect xx:xx:xx:xx:xx:xx --nodetach |
(where xx:xx:xx:xx:xx:xx is the mac address of your Desktop PC or Laptop)
This will give your Zaurus an additional network interface called bnep0 if a successful connection was established.
|
# ifconfig -a |
You can then configure your PAN network like this:
|
# ifconfig bnep0 192.168.12.201 # route add default gw 192.168.12.10 |
To check the connection ping your desktop or laptop:
|
# ping 192.168.12.10 |
This assumes that you have a 192.168.12.0 private network and your PC or Laptop is 192.168.12.10
To terminate the connection just type:
|
# pand -K |
Alternatively, you could also use the PAN applet in the network config tool to do the same thing or use my bluetooth-gui script.
Setting up a bluetooth Dialup connection
You can also use bluetooth to behave like a serial communication device. You can connect to other devices such as computers via a serial line similar to an IrDA connection but with a wider range and greater speed, or connect to a modem on a computer or mobile phone to dialup internet services. Using the serial communication feature, you can emulate PPP and/or use OBEX for file transfer (the IrDA beaming feature).
To setup bluetooth dialup service, for example, you can do the following to dial a GPRS on a mobile phone. First create a config file under /etc/ppp/peers as follows:
|
/dev/rfcomm0 115200 connect '/usr/sbin/chat -s -v -t 60 ABORT "NO CARRIER" ABORT "NO DIALTONE" ABORT "BUSY" "" "ATZ" OK "ATDP*99#" CONNECT' crtscts noipdefault modem usepeerdns defaultroute connect-delay 5000 remotename DUN1138428518 |
Make sure the remotename matches the id in /home/zaurus/Applications/Network/modules/Bluetooth.conf
For the Telstra GPRS no username and password was required and the network settings were DHCP. The only thing needed to be provided was the GPRS profile name which was telstra. The default dial string of atz was sufficient with *99# as the number which tells the phone to use its local profile. Additionally, *99***telstra.internet# could had been specified as well to choose a specific profile during dialing.
Then do the following:
|
# su # pppd file /etc/ppp/peers/yourconfig |
Alternatively, you could also use the Bluetooth (DUN) applet in the network config tool to do the same thing.
Setting up beaming with bluetooth via OBEX
You can use OBEX to push and receive files similar to IrDa but with bluetooth instead.
To transfer files towards the device, you have to install the package obexftp [obextftp_0.10.7_arm.ipk]. To transfer a file, simply execute:
|
# obexftp -b 00:00:00:00:00:00 -p file.ext |
The parameter -b instructs the program to use Bluetooth. If you omit the MAC address, obexftp will scan for surrounding Bluetooth devices and select the transfer partner automatically provided your device is visible and paired.
Alternatively, you can also use obextool:
|
# obextool push file.ext xx:xx:xx:xx:xx:xx 6 |
The bluetooth GUI allows you to convenniently select files to be beamed over.
![[screenshot of bluetooth GUI]](http://www.users.on.net/%7Ehluc/myZaurus/screenshots/sc-blue3.jpg)
To receive a file on your Zaurus via the Bluetooth interface, an OBEX server [obexserver_1.0_arm.ipk] has to be installed and running. The service "OBEX PUSH" also has to be registered to the SDP daemon:
|
# /usr/sbin/opd --mode OBEX+BIP --channel 4 --sdp --daemonize --path /home/zaurus/Documents/Obex_Inbox |
Securing Bluetooth
You can add some rudimentary security to bluetooth by editing /etc/bluetooth/hcid.conf:
- Turn on encryption
- remove the # in front of 'encrypt enable;'
- Hide your Zaurus so it cannot be discovered
- change 'iscan enable;' to 'iscan disable;'
- Disable connection to your Zaurus
- change 'pscan enable;' to 'pscan disable;'
You need to restart the bluetooth stack in order for the changes to take effect:
|
# su # /etc/rc.d/init.d/bluetooth restart |
Enabling Mouse
![[screenshot of mouse]](http://www.users.on.net/%7Ehluc/myZaurus/myMouse.jpg)
Yes, you can plug your USB mouse into the Zaurus but it won't work until you do the following:
|
# su # cd /home/QtPalmtop/plugins/applets # cp /home/zaurus/Documents/custom/libusbmouseapplet.so.1.0 . # ln -s libusbmouseapplet.so.1.0 libusbmouseapplet.so.1.0.0 # ln -s libusbmouseapplet.so.1.0 libusbmouseapplet.so.1 # ln -s libusbmouseapplet.so.1.0 libusbmouseapplet.so |
This custom driver package [zmouse_0.1_arm.ipk] should do the same thing.
Restart the Zaurus (or just restart Qtopia)
Alternatively, you can also install inputhelper [inputhelper_1.0.1-1_arm.ipk] which will give you mouse support as well as macro recording for your keyboard.
Enabling USB Keyboard
Yes, you can plug your USB keyboard into the Zaurus and it will work, but some of the keys will be mis-matched unless you are using a Japanese keyboard because the Zaurus' default keyboard layout is the Japanese keyboard. You need to remap the keyboard so the keystrokes matches that of the USB keyboard, but this of course will mess up the build-in keyboard on the Zaurus. You will need to switch between native keyboard and external keyboard mappings. You cannot have both keyboards mapped correctly at the same time unless your USB keyboard has the same layout as the Japanese keyboard or you hack the usbkbd kernel module.
![[screenshot of keyboard]](http://www.users.on.net/%7Ehluc/myZaurus/myKeyboard.jpg)
If you want to remap the keyboard so that it is correctly mapped for an external USB keyboard, then you need to install usbkbd-en [usbkbd-en_2.4.20_arm.ipk] which once installed will automatically switch your keyboard layout depending whether your USB keyboard is plugged in or not. So with this replacement driver installed and its associated scripts, if you plug in a USB keyboard, your keymap will be automatically remapped for a US/AU QWERTY keyboard. When you unplug the keyboard, then the keymap is reverted back to the previous keymap settings.
To manually control the keyboard remapping run the following to enable the USB keymap:
|
# usbkey enable |
To disable the USB keymap and revert back to the original map, type the following:
|
# usbkey disable |
In addition, you can also modify the keytable so that on a USB keyboard, the numeric keys on the keypad behave just like you press Shift and a number key on the top row. To get this behaviour, you need to install dualkbd_2.4.20_arm.ipk.
Enabling Joypad
You may be able to use your USB Joypad. Install the joyenabler script [joyenabler_1.3_arm.ipk] and plug in your joypad. If you are lucky, it will work and you can use jstest to check whether it works correctly. Now you just need to find some games that support joypad controls. You may need an additional joypad driver for your particular joypad if it does not work.
![[screenshot of joypad]](http://www.users.on.net/%7Ehluc/myZaurus/screenshots/zaurus-joy.jpg)
Enabling WebCam
You can use some USB webcams. You will need Video4Linux support for the kernel (videodev.o) and an appropriate video driver for the webcam. I currently have compiled drivers that work with four of my six webcams. You will also need some framegrabber software to capture video frames. I am currently working on some.
Enabling CD-ROM
USB CD-ROM drives are also supported similarly to USB harddisks. You will need to install some applications to rip and burn CD-ROMs [cdrtools-2.01.tar.gz]. A USB Mini-CD drive or a slim combo CDRW/DVD drive would be a great companion for the Zaurus.
The CD-ROM will be detected as /dev/scd0 and can be mounted as follows:
|
# su # mkdir -p /mnt/cdrom # mount /dev/scd0 /mnt/cdrom |
In addition, the following will be useful:
|
# su # mknod /dev/pg0 b 11 0 # mknod /dev/sg0 b 11 0 # ln /dev/scd0 /dev/cdrom # ln /dev/scd0 /dev/vcd # ln /dev/scd0 /dev/dvd echo "/dev/cdrom /mnt/cdrom auto ro 0 0" >> /etc/fstab |
In order to copy VCDs or DVDs from the CD to your disk, you need to install mplayer [mplayer-bvdd_1.1.5-1_arm.ipk] and mencoder [mencoder_1.1.0-1_arm.ipk]. A straight file copy won't work.
To copy the VCD video file (.dat file) do the following:
|
# mencoder vcd//:2 -oac lavc -ovc lavc -o filename.avi |
To extract the vob files from a DVD do the following:
|
# mencoder dvd://# -ovc lavc -lavcopts vcodec=msmpeg4:vpass=1 -oac mp3lame -lameopts vbr=3 -o movie.avi # mencoder dvd://# -ovc lavc -lavcopts vcodec=msmpeg4:vpass=2 -oac mp3lame -lameopts vbr=3 -o movie.avi |
See Video Conversion section on how to re-encode and compress the videos for optimal viewing on the Zaurus.
Enabling Microphone
You can plug any 3.5mm microphone into the Zaurus. Since there is only one input connector, you will need to use a splitter if you want to plug in both a microphone and earphones at the same time, or use a combined headset with microphone such as the one for mobile phones and use a 2.5mm to 3.5mm adaptor.
There is nothing special you need to do in order to enable the microphone except install some recording software. There is an application called qpe-voicerec [qpe-voicerec_1.5.0-7_arm.ipk] that comes on the CD-ROM accompanying the Zaurus. You can use that to record some voice.
![[screenshot of voicerecorder]](http://www.users.on.net/%7Ehluc/myZaurus/screenshots/sc-voiceecorder.jpg)
Alternatively, you can also use a console application called spxrec [spxrec_0.0.1_arm.ipk] to record lengthy voice sessions and then use shine [shine_0.01_arm.ipk] to encode to resulting sound file.
Connecting to VGA Monitor via USB
![[USBVGA]](http://www.users.on.net/%7Ehluc/myZaurus/SL-C1000VGA.jpg)
It is possible to connect the Zaurus to a VGA monitor or projector using a USB VGA dongle. The Kairen VGA adaptor is a USB VGA 2.0 adaptor that allows you to do slide show presentations using your Zaurus. You will need to use a USB hub to provide power as well as a USB host cable.
The Kairen USB2VGA dongle is detected as a sisusb vga device: USB2VGA dongle. It is allocated 8 output buffers with 8MB SDR SDRAM with a bus width of 32 by the driver.
The package vga-presentation_1.0.1_arm.ipk provides the driver and application for the USB dongle. I have only tested this specific model, but any USB dongle with the same SiS chipset (SiS 315E) should work also.
The VGA presentation application allows you to use the dongle for presentation. The application is limited to doing slideshows only. It slowly streams the data to the USB device which then buffers it and displays it to the monitor. I could even switch applications on the Zaurus while the presentation application continued to send data to the USB device and it renders it to the monitor. However, the VGA application crashes after a while so it needs a bit more work to iron out the bugs and fix the instability.
![[presenter]](http://www.users.on.net/%7Ehluc/myZaurus/scrnvga.gif)
The image on the monitor remains even when rebooting the Zaurus so I guess the last image displayed is buffered by the USB dongle and the monitor is getting the cached data from it.
This proves that it is technically possible to have VGA out for the Zaurus via USB, however, the current state of the driver and application is very limited and needs more work. It is also very slow due to the slow USB bus speed implemented by the Zaurus.
I then plugged the USB dongle into one of my PCs and used it to mirror and split the display on a Win2000 system without any problems. The speed was ok there because it was using USB 2.0 High Speed instead of USB 2.0 Full Speed that the Zaurus uses.
At this stage, the USB dongle does not perform better than displaying via a VNC server on the Zaurus and a VNC client on a PC to display the Zaurus desktop on a larger monitor. This works fine if you can network your Zaurus and the PC, but can't be done directly to a projector so this is where the USB dongle could be useful. With a USB dongle you do not need a PC or a laptop to act as the bridge device since the Zaurus can be directly connected to a projector or monitor.
For more info, visit the way-nifty blog where the images for the USB to VGA dongle and Presenter screenshot have been borrowed from.
Similarly, there are CF cards with VGA out capabilities similar to the USB dongle, however, none of those cards are manufactured anymore so you would need to get them second hand if you can find them. But even if you find those CF cards, you still need to compile drivers and applications for them if you manage to get the driver source code so they work on the C3x00, ie 2.4.20 kernel and glibc 2.2.2.
Connecting to Mobile Phone (SonyEriccson K750i)
![[my SonyEriccson K750i]](http://www.users.on.net/%7Ehluc/myZaurus/myPhone.jpg)
The Sony Ericsson K750i is a mobile phone with many features. It has a 2 mega-pixel camera, and a slot for a Memory Stick Pro Duo card. I have upgraded mine to 1 GB. It also has Infrared, Bluetooth and comes with a USB interface which can be used for file transfer with the Zaurus. The phone also has a GSM modem via a serial line as well.
Using the USB cable to access the Memory Stick
The memory stick can be accessed as a mass storage device when the mobile is connected to the Zaurus via a USB cable. However, the Zaurus does not recognise the manufacturer id as a mass storage device by default. To fix that, you need the append the following to /etc/hotplug/usb.usermap:
|
usb-storage 0x000f 0x0fce 0xd016 0x0000 0x0000 0x00 0x00 0x00 0x08 0x06 0x50 0x00000000 usb-storage 0x0380 0x0fce 0xd016 0x0000 0x0000 0x00 0x00 0x00 0x08 0x06 0x50 0x00000000 |
This should make the Zaurus detect the K750i's Memory Stick as a Mass Storage device the next time it is plugged in. However, if it does not, then try appending the above into /lib/modules/2.4.20/modules.usbmap and/or /etc/hotplug/usb.handmap
Using Bluetooth to access Memory Stick
Once you have either configured a USB Bluetooth dongle or a Bluetooth CF card, you can transfer files between the mobile and the Zaurus wirelessly using the OBEX via bluetooth mechanism. See the bluetooth section for more details.
Controlling the phone with the Zaurus
The K750i also offers a virtual serial interface that can be used to issue AT commands or trigger other phone functions. The serial line is accessible via the USB cable, as well as via Bluetooth. Once the link is established, you can access the data of the phone, interact with the user interface and manipulate the telephony functions.
Serial interface via USB
Once you plug in the phone, the Zaurus will not only recognize the USB storage device, but also detects the built-in modem. It then should load the appropiate cdc_acm module which brings support for USB modems and ISDN adaptors. The new device will be placed under /dev/ttyACM0 and /dev/ttyACM1. The devices can be opened with minicom or any other terminal program to gain access to the phone.
Serial interface via Bluetooth
Instead of relying on a wired connection, you can also use the Bluetooth interface to access this serial line.
Include the following section in the file /etc/bluetooth/rfcomm.conf:
|
rfcomm0 { bind yes; # MAC address of your phone: device 00:00:00:00:00:00; } |
Now reload the Bluetooth subsystem with /etc/init.d/bluetooth restart. If you already paired your computer with your phone, accessing the device /dev/rfcomm0 will instruct RFComm to connect to the phone without any user action needed. You can monitor the process with the rfcomm utility: rfcomm
Once a process opens the device file /dev/rfcomm0, the RFComm daemon contacts the phone. See the bluetooth section for more details.
Security
Hardening
assign passwords to root and zaurus
# su
# passwd
# passwd zaurus
tighten down the number of terminals in /etc/securetty
console
tty0
tty1
ttyUSB0
disable all non-essential listening ports
- disable telnet (port 23) if running
- shutdown ftp server if not used (port 21)
- shutdown Samba server and portmap (port 111) when not in use
- shutdown web server when not in use
- tighten down access for sshd (port 22)
- disable Qtopia sync with opie-security package (port 4242)
- disable port 4992 and 4244 with inetd.conf
Firewall
Install iptables modules and configure them as a packet filtering firewall. You can also install shorewall which is a framework that simplifies the management of iptable rules and configuration. To enable IP filtering firewall, install the following:
- iproute - [iproute_z2.2.4-now-ss991023-1_arm.ipk] or [iproute_20010824-1_arm.ipk]
- iptables-base - [iptables-base_2.4.20_arm.ipk]
- iptables-additional - [iptables-additional_2.4.20_arm.ipk] (optional)
- shorewall - [shorewall-c3000_1.4.5-1_arm.ipk]
This version has been customised specifically for the C3000 and C3100, primarily as a firewall while connected to a wireless network. Once installed, you can specify your network interface to be firewalled by modifying /etc/shorewall/interfaces. The default is to protect the wireless cf (wlan0) network using dhcp.
Once you have established a network connection, you can enable the firewall by issuing the following command:
|
# su # shorewall start |
Once you disconnect, you can stop the firewall by issuing the following command:
|
# su # shorewall stop |
To check the status of the firewall issue the following command:
|
# shorewall status |
The iptables-additional package contains extra libraries that will allow you to use all of shorewall's features.
VPN
Setting up a VPN connection with the Z is possible. You will need to install the following packages:
- iproute - [iproute_z2.2.4-now-ss991023-1_arm.ipk] or [iproute_20010824-1_arm.ipk]
- ipsec - [ipsec-module_2.4.20-1_arm.ipk]
- tun - [tun-module_2.4.20-1_arm.ipk]
- vpnc - [vpnc_0.3.2-1_arm.ipk]
Once installed, you can establish a VPN connection by issuing the following command from a console and providing the required settings:
|
# su # vpnc-connect |
To terminate the VPN session issue the following command:
|
# su # vpnc-disconnect |
sudo
Don't do this on Cacko. This is for SHARP ROM only.
install sudo [sudo_1.6.3p7-2_arm.ipk]
Once sudo is installed, you will need to configure it by using the visudo command. It will allow you to update /etc/sudoers
For example:
|
This uses the security conscious approach of only allowing sudo for the commands you want. If security is not such a concern for you and you just want to be able to sudo any commands as zaurus user without typing a password, then make it look like this instead:
|
root ALL=(ALL) ALL zaurus ALL=(ALL) NOPASSWD: ALL |
Emulators
Game Console Emulators
There are a few emulators for the popular game consoles for the Z. In order to use them, you will need to install SDL libraries [libsdl_1.2.5-slzaurus20050731_arm.ipk] if you have not installed them yet. There is also a nice front end to select and launch the game ROMs. Install the common emulator frontend [zemufe_0.1.1-3ex_arm.ipk]. It also has several addons which allows it to handle additional ROM types and emulators:
- zemufeex-smc_1.0_arm.ipk
- zemufeex-sms_1.0_arm.ipk
- zemufeex-wsc_1.1_arm.ipk
Then install the emulators:
- GameBoy - [zgnuboy_1.0.3-3_arm.ipk]
- Nintendo (NES) - [znester_7.1-1_arm.ipk]
- SuperNintendo (SNES) - [snes9x_sdl-1_arm.ipk]
The following is the key mapping for the emulator:
|
|
|
|
||||||||||||||||||||||||||||||||||||||||||||||||
You might also need to disable the key repeater while playing the games to avoid stuttering with the sound effects. If you have keyhelper installed, then you can run the following to temporarily disable the key repeater:
|
# khctl norepeat |
Once you have finished playing the games, you can re-enable the key repeat by running the following command:
|
# khctl repeat |
psx
You can even emulate Sony Playstation on the Zaurus with the psx4zaurus emulator. It requires the BVDD enabled SDL library. The bundle contains binaries for pdaXrom and Cacko which means you will either need Cacko or Sharp ROM with Tetsu's special kernel as well as the latest BVDD kernel module [bvdd_0.4.0-1_arm.ipk] and libSDL-bvdd [libsdl_1.2.5-bvdd-07-2_arm.ipk] installed.
Extract the psx4zaurus zip file and copy scph1001.bin to the same directory where you extracted the psx4all_cacko binary. Then place the ROM files into the games_psx directory. Use the up and down arrow keys to move between options and the x key to select an option.
zbochs
I tried running Win98 on zbochs [zbochs.tgz.gz]. It works but it is extremely slow. Too slow to be much use anyway. However, if you are bend on trying, then get the Linux or Windows version of bochs and use that to create a disk image with at least 250MB (Win98 will fail to install with less than that even though Microsoft website says it needs less). Then get your Win98 CD-ROM to install Win98 into bochs which will take about 4 hours on a 1 GHz Pentium with 512MB. Once you've done that copy your disk image file, BIOS (BIOS-bochs-latest) and VGA BIOS (VGABIOS-elpin-2.40) to your Zaurus. Also don't forget to copy bochsrc as well and remove the CD-ROM config. Here is a sample bochsrc:
|
romimage: file=BIOS-bochs-latest, address=0xf0000 vgaromimage: VGABIOS-elpin-2.40 megs: 16 ips: 500000 ata0: enabled=1, ioaddr1=0x1f0, ioaddr2=0x3f0, irq=14 ata1: enabled=0, ioaddr1=0x170, ioaddr2=0x370, irq=15 ata2: enabled=0, ioaddr1=0x1e8, ioaddr2=0x3e8, irq=11 ata3: enabled=0, ioaddr1=0x168, ioaddr2=0x368, irq=9 ata0-master: type=disk, path="c.img", cylinders=507, heads=16, spt=63 floppy_bootsig_check: disabled=1 mouse: enabled=1 vga_update_interval: 300000 keyboard_serial_delay: 250 keyboard_paste_delay: 100000 keyboard_mapping: enabled=0, map= boot: disk log: bochsout.txt panic: action=ask error: action=report info: action=report debug: action=ignore private_colormap: enabled=0 |
I also tried xqt-bochs_2.1.1-1_arm.ipk which appears to be a bit faster than zbochs. Here is Win98 starting up within xqt-bochs:
![[screenshot of bochs]](http://www.users.on.net/%7Ehluc/myZaurus/screenshots/sc-win98-01.jpg)
Eventually, after a long time of waiting, you get this once Win98 has finally loaded:
![[screenshot of bochs]](http://www.users.on.net/%7Ehluc/myZaurus/screenshots/sc-win98-02.jpg)
But really, emulated Win98 runs way too slow, but running DOS inside bochs for playing DOS games is possible.
dosbox
dosbox allows you to run DOS applications and games. The advantage over bochs is that it is dedicated and preconfigured to run DOS applications. chyang has built a version of dosbox that runs on the C3000 and C3100. I have packaged it as dosbox_0.6.3-3_arm.ipk. Once installed, you can edit /usr/local/dosbox/dosbox.conf and add entries after [autoexec] to automatically launch any DOS application you wish. For example:
|
[autoexec] mount c /mnt/card/dosfiles c: cd tetris tetris |
The screen flickers a bit when you launch dosbox. Just press the Cancel key a few times. When you have finished using dosbox, press Shift + Ctrl + Cancel to exit.
You might also need to install libstdc6_1.2.2_arm.ipk if you don't already have the standard C libraries installed.
![[screenshot of dosbox]](http://www.users.on.net/%7Ehluc/myZaurus/screenshots/sc-dosbox.jpg)
Alternatively, you can also install dosbox under X/Qt (or the newer pdaXqtrom package) - [dosbox-x11_0.6.3-3_arm.ipk].
dosbox has a known bug that keys on non-US keyboards are mismatched and some keys are missing, in particular the : key. This has been hacked by me for the Zaurus version so that Fn + ; is :, and Fn + Ctrl + ; is ;
qpose
Emulating the Palm on the Z is possible provided you have a Palm ROM file. Install the following and once done, use the Files tab to locate the ROM file and tap on it. The ROM will then be launched by QPose.
- qpose-data - [qpose-data_3.5-0.2-2_arm.ipk]
- qpose-bin - [qpose-bin_3.5-0.2-1_arm.ipk]
![[screenshot of qpose]](http://www.users.on.net/%7Ehluc/myZaurus/screenshots/sc-qpose.jpg)
zbasilisk
basilisk [zbasiliskii_0.3_arm.ipk] also works on the Z. Since I already have BasiliskII running on my PC, I simply copied the whole MacOS7.hfv file and the ROM image to the Z and then loaded zbasilisk. It launches X/Qt and runs from within it. zbasilisk emulates the Mac just like basilisk does on the PC, although slower and without sound.
![[screenshot of macos]](http://www.users.on.net/%7Ehluc/myZaurus/screenshots/sc-macos03.jpg)
If you want to emulate the Mac on the Zaurus, install BasiliskII on your PC and download the free MacOS7 binaries. Then create a hfv disk image with HFVExplorer (200MB should be enough) and copy the MacOS7.5.3 installer binaries onto the disk image. Then create a MacOS boot disk and start basilisk booting from the floppy. Once booted, install MacOS7.5.3. You might then want to upgrade to MacOS 7.5.5
Dictionaries
The Zaurus already comes with a Japanese-English dictionary which is great, however, it only does Japanese/English and English/Japanese. I need more languages such as German, French and Chinese.
Zdict is the dictionary that comes with the Zaurus. It seems to be almost the same with Zten which is mentioned a lot on the internet. Personally I think Zdict is easier to use than Zten.
![[screenshot of zdict]](http://www.users.on.net/%7Ehluc/myZaurus/screenshots/sc-zdict.jpg)
Zdict comes with the epwing genius and kojien dictionary packages, but there are some further epwing dictionaries that can be added to either zdict or zten. The following are the ones I have chosen to add:
- foldoc [foldoc-fpw1.0.1.zip] - computer terms dictionary
- jarg [jarg-fpw1.2a.zip] - jargon dictionary
- fumeikai [Fumeikai-1.0.zip] - abbreviations dictionary (in English and Japanese)
- wordnet [wordnet-1.6-fpw1.1.3.zip] English dictionary
- kanjidic [kanjidic_en.fpw.tar.gz] kanji dictionary
- wadoku [wadoku-fpw1.1.tar.gz] Japanese-German dictionary
- edict [edict_en.fpw.tar.gz] English-Japanese dictionary
To install these dictionaries, simply extract them to either /hdd3/dict1 or /hdd3/dict2 and select the book from inside the zdict config menu.
ZBedict [zbedic_0.9.4-0_arm.ipk] is another dictionary package that has a large amount of dictionaries in various languages. It also has a huge wikipedia [en-wikipedia.dic.dz]. The following are dictionaries I installed for it:
- English-English [en-0.9.0.dic.dz]
- German-English [deen-0.9.0.dic.dz]
- English-German [ende-0.9.0.dic.dz]
- French-English [fren-0.9.0.dic.dz]
- English-French [enfr-0.9.0.dic.dz]
- Spanish-English [esen-0.9.0.dic.dz]
- English-Spanish [enes-0.9.0.dic.dz]
- Italian-English [iten-0.9.0.dic.dz]
- English-Italian [enit-0.9.0.dic.dz]
- Chinese-English [zhen-0.9.0.dic.dz]
- English-Chinese [enzh-0.9.0.dic.dz]
- Japanese-English [jaen-0.9.0.dic.dz]
![[screenshot of zbedic]](http://www.users.on.net/%7Ehluc/myZaurus/screenshots/sc-zbedic.jpg)
Place the files under a directory such as /hdd3/Documents/dictionaries and do an autodetect in zbedic to locate them.
KanjiNirvana [kani_1.2.0_arm.ipk] is a kanji dictionary and practice tool. The following needs to be done after installation in order to update and add entries:
|
# su # chown -R zaurus:qpe /home/Qtopia/kani |
![[screenshot of kanjinirvana]](http://www.users.on.net/%7Ehluc/myZaurus/screenshots/sc-kanjinirvana.jpg)
qpzidian [qpzidian_0.1_arm.ipk] is a Chinese/English - English/Chinese dictionary that allows you to look up words via Hanzi and Pinyin.
![[screenshot of qpzidian]](http://www.users.on.net/%7Ehluc/myZaurus/screenshots/sc-qpzidian.jpg)
babbletower [babbletower_0.9.3_arm.ipk] is another dictionary reader written in Java. You need to install one of the J2ME implementations for Zaurus (jeode or personal profile) before you can use babbletower. It is also recommended to install jlauncher [jlauncher_0.1_arm.ipk] after you have installed one of the J2ME implementations so it helps babbletower launch the right J2ME runtime.
Speech Synthesis
flite
flite [flite_arm_bin.tar.gz] will read a text file with a male Scottish voice. To install it, simply gunzip and then untar the files to /usr/local/bin
|
# zcat flite_arm_bin.tar.gz | tar xvf - -C /usr/local/bin |
I've written a script saytime which gets the system time and passes it to flite_time. Also, I am planning to write a GUI interface (using J2ME) for flite [zflite-gui_0.3_arm.ipk] which lets you select a text file and then it will call flite with the text file as an argument or lets you type in some text and passes it to flite. In the meantime, I have used opie-sh to do something similar [zflite-gui_0.1_arm.ipk] although not as sophisticated and [zflite-gui_0.2_arm.ipk] which uses qshdlg.
Some flite options:
- --sets join_type=simple_join (use simple concatenation of diphones without prosodic modification)
- --setf duration_stretch=1.5 (make it speak slower)
- --setf int_f0_target_mean=145 (make it speak with higher pitch)
- -t "some text"
- -f filename
mbrola
mbrola [mbr301h.zip] is another voice synthesis application. It is an engine that converts diphones (.pho files) to voice (.wav files) and has exchangable libraries for different voices and languages. However, it needs additional software that converts text to .pho files. FreeTTS is such an application, however, it is written for Java 1.4 which does not exist for the Sharp distro (only Java 1.3 is available for Zaurus).
Unfortunately, this means that mbrola is pretty useless until FreeTTS has been backported to Java 1.3 which is not an easy task because FreeTTS uses a lot of the 1.4 features not available in 1.3, or until jamvm which is a jre 1.4 capable java runtime replacement can be made to run on the Sharp distro.
Video Conversion
The Movie Player that comes with the Zaurus is nice for playing MPEG files. I can just copy a .dat file from a VCD and rename it to .mpg and Movie Player can play them in a window and full screen.
However, since space is limited on the Zaurus, (yep, 4GB is nothing if you put a few vids on it), compressing the vids is a good idea. Unfortunately, Movie Player only plays MPG files.
No worries, mplayer will do the job. mplayer can play almost any format and there are also some nice GUI interface for mplayer such as kino2 and zplayer.
Here is what I do using VirtualDub to compress videos (there is a mod of virtualdub that can open mpg files as well - VirtualDub-MPEG2 1.5.10).
From the Virtual Dub Menu:
New height: 240 Filter mode: Nearest Neighbour
Data Rate: 150
Compression...
|
Then Save as AVI.
Alternatively, you can also use PocketDivXEncoder which is a derivative of mencoder to compress movies for the Zaurus. The default settings with 2-pass encoding does a pretty good job on the compression and quality. You can further tweak the settings for further compression at the loss of some quality.
![[PocketDivXEncoder]](images/custom/pocketdivx.jpg)
File Managers
The default File Manager (the Files tab) on the Zaurus is rather limited in functionality. There are, however, some better packages out there.
Tree!Explorer QT
[treeexplorer_1.7.0-2_arm.ipk] and [treeexplorer-p_1.7.0-2_arm.ipk]![[Tree!Explorer]](http://www.users.on.net/%7Ehluc/myZaurus/screenshots/sc-treeexplorer.jpg)
This is a nice application similar to Windows Explorer in tree mode with OpenWith and SendTo functionality, however, you only get the full functionality if you pay for the pro edition. The lite version is only good for moving files around but you cannot launch any files. You also get an additional file editor with the pro edition.
Explorer
[explorer_1.0_arm.ipk]![[Explorer]](http://www.users.on.net/%7Ehluc/myZaurus/screenshots/sc-explorer.jpg)
This application is for moving and copying files around only. The good thing about it is that it contains two tabs which represent two different directory locations between which files can be easily moved. It also has a FTP client so you can also move files between your local disk and an FTP server. However, it hangs if you copy or move large files.
AdvancedFM
[qtopia-advancedfm_1.0_arm.ipk]![[Advanced FileManager]](http://www.users.on.net/%7Ehluc/myZaurus/screenshots/sc-advancedfm.jpg)
This application is almost like the Explorer application mentioned above, but it does not have the FTP functionality. It has, however, a handy bookmark feature for quickly accessing frequently used directories and can open files as text files and run them (if they have appropriate file associations).
FileLaunch
[filelaunch_0.4.5_arm.ipk]![[FileLaunch]](http://www.users.on.net/%7Ehluc/myZaurus/screenshots/sc-FileLaunch.jpg)
This application is great and heavily customisable. You can have a single explorer panel or split the screen into two panels either horizontally or vertically. It has a full set of file management features and even has options to run each command in sudo mode. There is also a build-in menu system which can be customised to have all your favourite apps in one handy location. It also lets you add your own shell commands in any combinations you want and has already got a set of useful shells for compressing and uncompressing files as well as search and convert. There is also a handy preview feature to view images as well as text and html files.
FileLaunch is originally written in Japanese. I am in the process of translating all the menus and messages to English. The repackaged version [filelaunch-en_0.4.5_arm.ipk] will be available once I finish the translation.
FileLaunch is based on TinyViewer and qshdlg. TinyViewer [tinyviewer_0.3.1_arm.ipk] is a small and simple file browser that allows you to preview files such as images and simple text. tvtools [tvtools_0.0.2_arm.ipk] is an addon to tinyviewer to allow you to view archive files such as zip files.
MidnightCommander
[mc_4.6.0_arm.ipk]![[MidnightCommander]](http://www.users.on.net/%7Ehluc/myZaurus/screenshots/sc-mc.jpg)
This is a nice console application like Norton Commander. It has all the file management features that one would need and also works with FTP. However, it uses the extended character set to draw the borders which does not get properly mapped with the Japanese locale unless you use the unismall font which makes the display too tiny.
PIM
The default calendar and addressbook applications aren't that good, so it is better to add something more useful such as kdepim [kdepim_2.1.2_for_SharpRom.ipk.zip] or later, which has a whole suit of PIM applications. PIM software seems to be the most popular and get updated quite frequently, so make sure to get the latest version.
Download and extract kdepim_2.1.2_for_SharpRom.ipk.zip and then install kmicrokdelibs [kmicrokdelibs_2.1.2_arm.ipk] and pimTABicon [pimTABicon_2.1.2_arm.ipk] first. Following this, do the following:
|
# mkdir /hdd3/zaurushome/kdepim # cd /home/zaurus # ln -s /hdd3/zaurushome/kdepim kdepim |
Now install whichever of the following packages you want:
OM/Pi email [kopiemail_2.1.2_arm.ipk]
You will need to install lib openssl [openssl_0.9.7d_arm.ipk] and [download sr-character-conversion_SharpROM_arm.ipk.zip] for character conversion from the sourceforge project site as well.
KO/Pi calendar [korganizer_2.1.2_arm.ipk]
You might also want to add [korganizer-alarm_2.1.2_arm.ipk] which provides an alarm applet that will wake the Zaurus from suspend if an event triggers occurs and sounds an alarm.
KA/Pi addressbook [kaddressbook_2.1.2_arm.ipk]
PwM/Pi password manager [pwmanager_2.1.2_arm.ipk]
ksharpPIM-DTMaccess [ksharpPIM-DTMaccess_2.1.2_arm.ipk]
This is used to sync KA/Pi and KO/Pi with the Sharp PIM applications on the Zaurus, which use the new Sharp DMT Pim format.
kmobilephoneaccess [mobilephoneaccess_2.1.2_arm.ipk]
Command line tool for accessing mobile phones. It is used from Kx/Pi to sync with / export to mobile phones.
I don't use PIM stuff much and I don't sync either. My Zaurus is my laptop. All my important stuff is on my Z, so I only tried the email, calendar and address book without the rest of the sync stuff. Firefox, Thunderbird and Open Office is what I use mainly.
Java
Java seems to have been discontinued for the Zaurus. The SL-C3000 as well as any later models such as the SL-C3100 do not get shipped with any JVM/JRE (Java Runtime) anymore. Also there has not been any newer versions of the JVM for Zauri since the 1.3.1 release. Java currently is at 1.5.x (April 2005).
There are several Java flavours available for the Zaurus. Most of them are J2ME distributions. J2ME is the micro-edition of Java which was designed for small portable devices.
There is a J2SE package available as well. J2SE is the "normal" Java that runs on most desktop and laptop computers.
You will need a J2ME flavour of Java to run most of the Java applications available for the other Zauri and PDAs, and a J2SE if you want to try running Java applications that run on PCs.
The following is a small list of available Java runtimes:
- Insignia's Jeode (J2ME that comes with earlier Zauri)
- on the Zaurus CD - [jeode_1.10.7_arm.ipk]
- downloadable from Sharp website - [5500v31c.zip]
- Sun's J2ME preview
- [personal-profile-for-zaurus_arm.ipk]
- [pp4zaurus-1_0-ea4a-linux-arm-OptimizedJIT_nosym.zip]
- [java_slc3000_arm.ipk]
- Blackdown Java-Linux (J2SE port for Linux)
- [java1.3_1.01-oxy2_arm.ipk]
- [j2re-1.3.1-RC1-linux-arm.tar.bz2]
- [blackdown-jdk_1.3.1_arm.ipk]
J2ME
Just install one of the J2ME implementation listed above and you should be fine for most Java apps for the Zaurus.
It is technically also possible to run Swing applications with the J2ME distributions using the SwingZ library that you can add to Jeode or the Personal Profile. Simply include the swingz.jar into the classpath. However, this swing library is implementing swing 1.1 only. Most swing applications therefore won't run.
I have also created jlauncher [jlauncher_0.1_arm.ipk] which is a wrapper for evm (jeode) and cvm (personal profile) so that applications specifically packaged for either of those J2ME runtimes can be seemlessly run no matter which of the two J2ME bundles you have installed. For example, a java package bundled for jeode won't run if you only have personal profile installed unless you manually change the script for the application to use personal profile and vice versa. jlauncher will automatically handle it for you.
MIDP
If you also want to run Java applications that run on your mobile phone, ie MIDP flavour of J2ME then you need to install me4se and the midp game and media classes (which you can extract from the midp 2.0 developer kit.
The following are required:
- evm (jeode_1.10.7_arm.ipk)
- me4se.jar
- midp-2_0-src-linux-i686.zip
Extract at a minimum the following files from midp-2_0-src-linux-i686.zip and put them into a zip file retaining the directory structure:
- javax/microedition/lcdui/game/GameCanvas.class
- javax/microedition/lcdui/game/GameDeviceCaps.class
- javax/microedition/lcdui/game/Layer.class
- javax/microedition/lcdui/game/LayerManager.class
- javax/microedition/lcdui/game/Sprite.class
- javax/microedition/lcdui/game/TiledLayer.class
- javax/microedition/media/Control.class
- javax/microedition/media/Controllable.class
- javax/microedition/media/Manager.class
- javax/microedition/media/MediaException.class
- javax/microedition/media/Player.class
- javax/microedition/media/PlayerListener.class
- javax/microedition/media/control/ToneControl.class
- javax/microedition/media/control/VolumeControl.class
Rename the zip file to something like midpx.jar and then use the following command to launch the mobile phone java game assuming all the jar files are in the current directory and we have a game Xyanide_141.jar:
|
# evm -classpath ./me4se.jar:./midpx.jar:./Xyanide_141.jar org.me4se.MIDletRunner GameMIDlet |
![[midp]](http://www.users.on.net/%7Ehluc/myZaurus/screenshots/sc-midp.jpg)
If you want to play another game then just specify the jar file of that game instead. The last parameter is the classname for the game. This value can be extracted from the jad file or the manifest file inside the jar file and is the last argument of the MIDlet-1 variable after the icon name.
I have also created midp-launcher [midp-launcher_0.2_arm.ipk] which is a qshdlg script providing a GUI game selector to launch game files located under /home/zaurus/Documents/games/j2me. It also includes a modified version of me4se.jar that uses the larger 640x480 screen instead of the default mobile screen size. It also includes other necessary files such as midpx.jar.
![[midp]](http://www.users.on.net/%7Ehluc/myZaurus/screenshots/sc-opera-mini.jpg)
midp-launcher also has a command line interface which you can use to launch midp jar files:
|
# midp /mnt/card/opera-mini1.2.2960-basic-us.jar |
J2SE
Installing the J2SE version from Blackdown is a bit trickier. If you install the ipk version, then you need to do the following hacks to get it working after the install:
|
For the bz2 compressed version, you should extract it to /usr/local and then do the following:
|
# ln -s /usr/local/j2re1.3.1/bin/java /usr/bin/java # ln -s /usr/local/j2re1.3.1/bin/armv4l /usr/local/j2re1.3.1/bin/armv5tel # ln -s /usr/local/j2re1.3.1/lib/armv4l /usr/local/j2re1.3.1/lib/armv5tel # ln -s /usr/lib/libstdc++-3-libc6.1-2-2.10.0.so /usr/lib/libstdc++-libc6.2-2.so.3 |
If you don't have the libstdc++ library then install this libstdc6_1.2.2_arm.ipk package.
Remember that if you want to run Java (J2SE) in graphics mode, ie awt and swing, then you need to install X/Qt (see X/Qt section) and you might need additional libraries which may or may not have been bundled with the blackdown distribution you installed. The following is a list of libraries you might need to add (which are contained in additional-ipaq-stuff.tar.gz):
- libBrokenLocale-2.2.2.so linked to libBrokenLocale.so.1
- libXm.so.2.1 linked to libXm.so.2
- libXp.so.6.2 linked to libXp.so.6
You should also install JSSE which will add SSL support for Java 1.3.x. Download the JSSE zip file (jsse-1_0_3_03-gl.zip) from Sun's website and extract the three .jar files and copy them to the .../jre/lib/ext directory.
If you want to write Java applications on the Zaurus as well in addition to just running them, then you need a Java compiler. The following compilers are available:
- IBM's Jikes - [zaurus_jikes.tar.gz]
- Kopi Compiler - [Kopi.1.5.zip]
- Sun's javac - [tools.jar] from a 1.3.1 JDK
I have created ipk files for the following Java applications that I've written:
- HdPad 1.0 (Java Text Editor) - [hdpad_1.0_arm.ipk] (works with J2ME but needs rt.jar from blackdown; works with J2SE in X/QT)
- HdProxy 1.1 (Java Proxy Server) - [hdproxy_1.1_arm.ipk] (works with J2SE in X/Qt)
- HdCrawler 2.5 (Java Download tool for Yahoo and MSN groups) - [hdcrawler_2.5_arm.ipk] (works with J2SE and JSSE added in X/Qt)
![[screenshot of HdPad]](http://www.users.on.net/%7Ehluc/myZaurus/screenshots/sc-hdpad.jpg)
More info about these Java apps can be found at the HdLSoft site.
I have also created a cramfs image with the jre and tools pre-installed and configured. All you need to do to use it is to mount the cramfs image and create some links to the executables by running java-setup.
|
# su # mkdir -p /mnt/java # mount -o loop /hdd3/java.cramfs /mnt/java # echo "/hdd3/java.cramfs /mnt/java cramfs loop 0 0" >> /etc/fstab # /mnt/java/java-setup |
See the X/Qt jumbo section for more details. You will need X/Qt if you want to run awt or swing.
Note: You should install automounter [automounter-c3000_0.5.0_arm.ipk] which automates the creation of additional loop devices and mounting of the cramfs images.
The java cramfs also has HdPad and HdCrawler pre-installed as well as kopi and jikes compiler, and tools from the GNU classpath project.
Java Alternatives
There is a way to run Java 1.4.x applications on the Zaurus through a Java compatible runtime such as JamVM. JamVM is not officially endorsed nor certified to be Java compliant, but it is able to run most Java 1.4.x and even 1.5 applications. JamVM uses libraries from the GNU classpath project to run Java applications.
jEdit can be run using JamVM:
![[screenshot of jedit]](http://www.users.on.net/%7Ehluc/myZaurus/screenshots/pdaXqtrom-jedit.jpg)
JamVM GUI applications (AWT and Swing) require a X/Qt environment for display.
gcc
If you want to develop and compile your own C/C++ applications then you will need gcc. There are basically two flavours of development for the Zaurus. You can develop on the Zaurus itself using the on-board or native gcc compiler to build your application binaries or use a cross compiler to build your applications from a PC. The on-board development is particular useful for small applications. However, for larger applications, the Zaurus might not be powerful enough unless you want it sitting on a desk compiling your applications continuously for days. In order to use a cross-compiler, you would need a x86 based PC or something that is powerful enough to emulate it.
There are several cross compile toolchains which allow you to compile applications for the Zaurus. One of the easiest to setup and getting started with is the kopsis toolchain (http://kopsisengineering.com/kopsis/SharpZaurusSdkDsl) which uses the DSL (Damn Small Linux) Live CD technology allowing you to boot the CD and have a ready development environment or use the CD image from a x86 emulator such as qemu, bochs or vmware. There is a great vmware image of DSL made by speculatrix. You can download is from http://www.zaurus.org.uk/downloads.html
There are several on-board development images as well, but none had everything I needed, so I built my own on-board development environment based on the zgcc 2.95.2 cramfs image (zgcc2Bin.cramfs) which is derived from the Debian arm distribution. My zgcc development image (zgcc2-95-2-lite) comes in a single cramfs image and includes necessary headers and libraries to compile and build console based applications, Qtopia applications (QT/E 1.5) as well as kernel modules for the 2.4.20 kernel. This image is as small as it gets and does not include documentation.
I also made a bigger image (zgcc2-95-2) which is compressed as a squashfs image instead to save space. This larger image includes X11 headers and libraries and supports compiling X/Qt applications, especially pdaXqtrom (in fact pdaXqtrom was build using it). It can build many of the opensource applications, both console and X based ones while also retaining the ability to build Qt/E 1.5 applications.
In addition, I also build a newer and even bigger image based on gcc 2.95.3 and a host of updated tools including binutils 2.16, autoconf 2.59, automake 1.9.2, coreutils 5.0, diffutils 2.8.1, gawk 3.1.5, grep 2.5, sed 4.0.9, tar 1.15, texinfo 4.8. A patched glibc 2.2.2 is also bundled and used to link against so applications requiring fesetenv/fegetenv can be successfully compiled with this image. Additionally, this image also contains additional headers and libraries as well as tools to build QT 3.3.6 applications under X11.
The zgcc image that I build is very simple to setup. All you need to do is mount the cramfs or squashfs image and run zgcc-config. Here is an example for a squashfs image:
|
# su # mkdir -p /mnt/zgcc # mount -o loop /hdd3/zgcc2-95-2.squashfs /mnt/zgcc # echo "/hdd3/zgcc2-95-2.squashfs /mnt/zgcc squashfs loop 0 0" >> /etc/fstab # /mnt/zgcc/zgcc-config # source /mnt/zgcc/zgcc-env |
Note: You should install automounter [automounter-c3000_0.5.0_arm.ipk] which automates the creation of additional loop devices and mounting of the cramfs/squashfs images.
Your zgcc is now ready and should get automatically mounted after each reboot (provided you installed automounter, otherwise you will need to mount it manually) and the environment should also be set for you automatically each time you start a new terminal session as the zaurus user.
Temporary files during compilation go to /tmp by default, which will give you problems with larger compiles since the Sharp distro has a size of 1MB for /tmp. The easiest way to fix this is to set the TMPDIR variable and point it to somewhere with more space such as /hdd2/tmp.
|
# mkdir -p /hdd2/tmp # export TMPDIR=/hdd2/tmp |
The zgcc development image also comes with some simple samples. There is a console helloworld application and a sample Makefile to compile it. I also included a hello-qt sample which demonstrates a simple Qtopia version of helloworld. And last but not least, I also included a sample driver module and Makefile to test building kernel modules.
tmake also works for generating Makefile for Qtopia applications. You can even use configure to generate the Makefile for compiling source packages for various Linux ports and projects, in particular X/Qt and pdaXqtrom sources. Perl and xml-parser is also bundled with the larger images.
If you su to root user, then the environment variable for gcc are not set automatically. This was done on purpose. If you want to enable gcc for the root user temporarily, then do the following:
|
# source /mnt/zgcc/zgcc-env |
If you have the 2.95.3 image, then you can also compile Qt 3.3.6 applications. However, the default environment is configured for Qt/E development. To switch to QT 3.3.6, do the following:
|
# source /mnt/zgcc/qt3/qt3-env |
Note: QT 3.3.6 support is experimental. Not everything might work or compile.
Perl
You do not need to install Perl separately if you have installed the zgcc image, but if only want Perl without the gcc compiler, then do the following:
|
# su # ln -s /usr/local /home/root/usr |
Then install the following packages:
- libperl - [libperl_5.6.1_arm.ipk]
- perl-base - [perl-base_5.6.1_arm.ipk]
- perl5 - [perl_5.6.1_arm.ipk]
Once the packages have been installed add the following to the .profile file:
|
export LANGUAGE=C export LC_ALL=C |
You might also want to do the following:
|
# su # ln -s /usr/local/bin/perl /usr/bin/perl |
Optionally, you might also install a XML parser [xml-parser_2.31-1_arm.ipk] module for perl.
Installing X/Qt
This can be a quite simple and straightforward task or a messy and frustrating experience. If you are lucky, everything just installs and you got X/Qt up and running in no time at all. However, if you are unlucky, then troubleshooting a broken installation can be a challenging and frustrating process. I've sucessfully installed the latest version of X/QT, but I have noticed that some X/Qt packages do not uninstall cleanly and will confuse reinstalls or other packages that have dependancies on them. Not all the packages that I installed are required for basic X to work under Qtopia, however, with this set of libraries, you can easily run Firefox and Debian PocketWorkstation.
You can either follow the instructions below or use the jumbo package instead. The jumbo package section is more up to date.
Install the following packages in the the given order:
- xqt-fonts-misc [xqt-fonts-misc_4.3.0-3_all.ipk]
- xqt-fonts-100dpi [xqt-fonts-100dpi-iso8859-1_4.3.0-3_all.ipk]
- xqt-fonts-75dpi [xqt-fonts-75dpi-iso8859-1_4.3.0-3_all.ipk]
- xqt-server [xqt-server_1.9.0_arm.ipk]
- xbase-etc [xbase-etc_4.3.0-3_all.ipk]
- zlib - [zlib_1.2.2-1_arm.ipk]
- xlibs [xlibs_4.3.0-3_arm.ipk]
- xbase-client [xbase-clients_4.3.0-3_arm.ipk]
- gdk-pixbuf [gdk-pixbuf_0.22.0-2_arm.ipk]
- glib [glib_1.2.10-0vl3_arm.ipk]
- glib-additional [glib-additional_1.2.10-2_arm.ipk]
- glibc-locale-ja-eucjp [glibc-locale-ja-eucjp_2.2.2-1_arm.ipk]
- glibc-locale-ja-utf8 [glibc-locale-ja-utf8_2.2.2-1_arm.ipk]
- glibc-gconv-ja [glibc-gconv-ja_2.2.2-1_arm.ipk]
- glib2 [glib2_2.4.7_arm.ipk]
- libgcc1 [libgcc1-zaurus_3.2.2-0_arm.ipk]
- freetype [freetype_2.1.5-1_arm.ipk]
- fontconfig [fontconfig_2.2.1-1_arm.ipk]
- fontconfig-etc [fontconfig-etc_2.2.1-1_all.ipk]
- xqt-fonts-encodings [xqt-fonts-encodings_4.3.0-3_all.ipk]
- atk [atk_1.6.1_arm.ipk]
- gtk [gtk_1.2.10.1_arm.ipk]
- gtk2 [gtk2_2.4.13_arm.ipk]
- libpng3 [libpng3_1.2.4-1_arm.ipk]
- libtiff [libtiff3.6.1-1_arm.ipk]
- pango [pango_1.4.1_arm.ipk]
- blackbox [blackbox_0.65.0-2_arm.ipk]
- rxvt [rxvt_2.6.4-1_arm.ipk]
- xqtclip [xqtclip_0.0.2_arm.ipk]
- xqt-startup-scripts [xqt-startup-scripts_0.0.3_all.ipk]
Once the packages are installed, do the following:
|
# cd /opt/QtPalmtop/bin # su # ln -s Xqt X # ln -s rxvt xterm |
add the following to /home/zaurus/.xinitrc
|
xmodmap -e "keycode 69 = slash comma" xmodmap -e "keycode 70 = period question" xmodmap -e "keycode 22 = minus grave" xmodmap -e "keycode 60 = grave" |
Hint: you can use the command line program xev from within X to determine the keycode of different keys on the SL-C3000 and SL-C3100 keyboard and add the mapping with xmodmap like I did, or alternatively, you can create a .xmodmaprc file to customize your keymaps instead:
|
# xmodmap -pke > /home/zaurus/.xmodmaprc |
In addition, I modified .xinitrc and replaced the line:
| rxvt & |
with the following:
if [ -f $HOME/.xstart ]; then
$XAPP & rm $HOME/.xstart
|
Then I replaced the content of /home/QtPalmtop/bin/startx-wrapper with the following:
|
#!/bin/sh X=`ps -ef|grep X|grep qt` if [ "$X" = "" ]; then
startx
$1 & |
Create a link:
|
# ln -s /home/QtPalmtop/bin/startx-wrapper /home/QtPalmtop/bin/xlauncher |
With this modification, I can run X application such as firefox by issuing the command:
|
# xlauncher firefox |
This causes firefox to be run, and if X is already running it will just appear inside X, but if X has not been started yet, it will start X as well. This is nice for adding X application icons on the Qt desktop.
X control can be activated by pressing the menu button which allows you to switch to fullscreen and shutdown X.
Note: You can also install [xqt-debian-scripts_0.5_arm.ipk] instead of xqt-startup-scripts [xqt-startup-scripts_0.0.3_all.ipk] which will give you an even more enhanced .xinitrc and startx-wrapper and you don't need to do the above modifications manually. (It will also give you an addtional X/Qt tab and some pretty icons for X applications such as firefox, the gimp, abiword and pocketworkstation which you can delete if you don't like them)
![[X/Qt]](http://www.users.on.net/%7Ehluc/myZaurus/screenshots/sc-xqt.jpg)
If you want to try installing Thunderbird or Minimo, then do the following as well:
|
# su # pango-querymodules > /etc/pango/pango.modules # mkdir -p /etc/gtk-2.0 # gdk-pixbuf-query-loaders > /etc/gtk-2.0/gdk-pixbuf.loaders |
You also need to install the following patch:
- xqt-libXrender [xqt-libXrender_1.2.2_arm.ipk]
This will fix the fonts problem with Thunderbird. Without this updated library the fonts in Thunderbird are not being displayed at all.
Debian/PocketWorkstation
You can run Debian in chroot mode so it can coexist with the existing system (Sharp ROM with Qtopia). You will need to install X/Qt first (see above) or run it via VNC. You could also install Debian using my pre-build debian image (see the X/Qt jumbo and PocketWorkstation section), otherwise follow the instructions below to install Debian manually.
Debian needs to be installed on an ext2 filesystem with at least 195MB of free space. Unfortunately, /hdd3 is vfat. You could reformat /hdd3 as an ext2 filesystem (but that is troublesome), or install Debian to an ext2 formatted CF or SD. Alternatively, you can create a loopback filesystem on /hdd3 and format it as ext2.
Since there is space on /hdd3, creating a loopback filesystem for Debian would be the best unless you have already filled up /hdd3 in which case you can install Debian to a SD or CF card.
You can either follow the instructions below or use the jumbo package instead.
If not using the jumbo package, here is how you create the loopback filesystem with 256MB on /hdd3 (if you want to install OpenOffice, make it at least 512MB):
|
# su # cd /hdd3 # mkdir debroot # mknod /dev/loop2 b 7 2 # dd if=/dev/zero of=/hdd3/pocketworkstation bs=1M count=256 # echo y | /sbin/mke2fs pocketworkstation # mount -o loop -t ext2 /hdd3/pocketworkstation /hdd3/debroot |
Here is how you format your SD card to be ext2 (insert an empty SD card, otherwise you will lose everything that was on it):
|
# su # umount /mnt/card # mkfs.ext2 /dev/mmcda1 # mount -t ext2 /dev/mmcda1 /mnt/card # mkdir /mnt/card/debroot |
You can also leave your SD as FAT and not format it as ext2. You will need to create a loopback filesystem on your SD similar to the above sample for creating a loopback filesystem on /hdd3.
Also create a 128MB swapfile for Debian if you haven't got one yet.
|
# su # dd if=/dev/zero of=/hdd3/swapfile bs=1048576 count=128 # mkswap /hdd3/swapfile |
Now we are ready to install Debian [zaurus-debian-big-v0.17.tgz]. We will now assume installation into /hdd3/debroot. Replace with /mnt/card/debroot as appropriate. Change to the directory where zaurus-debian-big-v0.17.tgz is located and then do the following:
|
You will also need sudo (see above in sudo section). Once sudo is installed, add the following to the zaurus user's NOPASSWD list using visudo:
- /bin/mount
- /sbin/chroot
- /sbin/swapon
Install [xqt-debian-scripts_0.5_arm.ipk] (unless you installed the jumbo package) and then click on the Debian icon on Qtdesktop. Wait a bit for X and PocketDesktop to load. You won't see the taskbar at first because it is hidden beneath your Qtopia taskbar. Press your menu key to change to fullscreen mode.
If you want the icewm task bar to appear at the top instead of the bottom of the screen, then edit /home/zaurus/.icewm/settings and change the TaskBarAtTop entry.
|
TaskBarAtTop=1 # 0/1 |
If you don't want to use sudo, then you can start PocketWorkstation as root. You need to copy .xinitrc from /home/zaurus to /home/root and then make sure you use su - before you run xlauncher debian from a console/terminal window. You will also need to copy the .icevm directory. However, the icons on the Qt Desktop cannot be launched as root. You will have to configure sudo if you want to be able to launch using those icons.
|
# su # cp /home/zaurus/.xinitrc /home/root # chown root:root /home/root/.xinitrc # cd /hdd3/debroot/home # cp -R zaurus/.icewm root # cd /hdd3/debroot # su - # xlauncher debian |
The xqt-debian-scripts package is an enhanced replacement for xqt-startup-scripts. Your X will work just as before, so you will now have a X server icon and a Debian icon. Your existing X apps will launch into normal X if there is no other X server running, but if Debian is running, they will just launch into the Debian X session and assume the look and feel of icewm. They will look the same as your Debian applications, however, since the applications were launched outside the chroot environment, they retain their access to the normal environment but just appear inside the same X window session. The xqt jumbo package includes the xqt-debian-scripts package, so if have installed the xqt jumbo package, then don't install the xqt-debian package since it is already included.
![[PocketWorkstation]](http://www.users.on.net/%7Ehluc/myZaurus/screenshots/sc-debian.jpg)
Use the xlauncher command to start X applications from the command line or use it as the launcher for a Qt desktop icon (see Firefox section for an example).
The mouse function is emulated as follows:
- Tapping on screen = Left Click
- Fn + Shift + Tapping = Center Click
- Fn + Tapping = Right Click
The xlauncher also automatically mounts and binds your SD and CF cards if they are inserted (before Debian is started) so that they will be acessible from within Debian.
You can also manually mount and unmount them. Here is an example on how to mount your SD card so it can also be used from the chrooted Debian:
|
# su # mount -o bind /mnt/card /hdd3/debroot/mnt/card |
The following unmounts the SD card so it is unmounted from the chrooted Debian but still mounted for Qtopia/uLinux environment:
|
# su # umount /hdd3/debroot/mnt/card |
Note: There are only 2 loop devices by default. You might need to create more. See filesystem section for more details.
Since there are regular new builds of Debian available, this Debian image will probably be slightly out of date. You can update your Debian installation by running the following commands (assuming you are connected to the net). This step is not really necessary unless you want the latest and greatest (and have sufficient space for whatever gets thrown at you):
|
# source /root/.profile # apt-get update # apt-get upgrade # apt-get clean |
You can now use apt-get to install new applications. apt-get by default connects to the internet to get the required packages for you. If you already have the required files downloaded or don't want to connect to the internet for installations, then you can also make apt-get install your .deb files from a local directory. You would need to install the dpkg-dev package first.
Once that is done, make a directory such as /home/zaurus/Documents/Install_Files/debs and place all your .deb files in there. Then generate a package summary file (Packages.gz).
|
# mkdir -p /home/zaurus/Documents/Install_Files/debs # cp *.deb /home/zaurus/Documents/Install_Files/debs # cd /home/zaurus/Documents/Install_Files # dpkg-scanpackages debs /dev/null | gzip > debs/Packages.gz |
now add the following as the first entry in /etc/apt/sources.list
| deb file:/home/zaurus/Documents/Install_Files debs/ |
apt-get should now look for files located under /home/zaurus/Documents/Install_Files/debs when you try to install a package. You can also comment out the other entries with a hash (#) if you don't want apt-get to connect to the internet. Also, whenever you add new files to /home/zaurus/Documents/Install_Files/debs you will need to re-run dpkg-scanpackages
As an alternative to running Debian under X/Qt, you can also use VNC to run Debian instead, or even do a combination of X/Qt and VNC. The VNC and X/Qt sessions will have different settings, but if you want them to at least share some of the icevm settings, do the following:
|
# su # cd /hdd3/debroot # ln -s home/zaurus/.icevm root/.icewm |
Make sure the DEBROOT in /etc/debroot.conf is set to /hdd3/debroot
|
# The chroot directory for the Debian installation DEBROOT=/hdd3/debroot |
To start the VNC server, do the following:
|
# su # Vncserver |
Now just connect to it via a vnc client such as keypebble (see VNC section).
OpenOffice 1.1.4
Yes, OpenOffice works on the C3000 and C3100! However, you will need to install PocketWorkstation first which also involves installing X/Qt (see other sections). Alternatively, you can also run OpenOffice as a cramfs image with the X/Qt jumbo package without installing PocketWorkstation (see X/Qt jumbo section for further details). The following section describes installing OpenOffice under PocketWorkstation.
You will also need 200MB of free disk space on your PocketWorkstation disk to store the installed OpenOffice files. In addition, you also need 78MB of space for the extracted installation binaries. The compressed OpenOffice installation binary [OOo_SRX645_linuxarm_install.tar.gz] is 71MB in size. If you have sufficient space, you will be able to install OpenOffice.
If you installed Debian on a 512 MB or greater SD or CF, or on a 512 MB loopback filesystem on hdd3, and have more than 200 MB of free space left on those devices, then you are ready to install OpenOffice. However, if you installed Debian on a 256 MB loopback system or don't have enough free disk space left on your loopback filesystem, but still have plenty of disk space left on hdd3, then you can create and mount an additional loopback filesystem. To create an additional loopback filesystem do the following:
|
# su # cd /hdd3 # mkdir OpenOffice.org1.1.4 # mknod /dev/loop3 b 7 3 # dd if=/dev/zero of=/hdd3/openoffice bs=1M count=256 # echo y | /sbin/mke2fs openoffice # mount -o loop -t ext2 /hdd3/openoffice /hdd3/OpenOffice.org1.1.4 # mount -o loop -t ext2 /hdd3/pocketworkstation /hdd3/debroot # mkdir -p /hdd3/debroot/home/zaurus/OpenOffice.org1.1.4 # mount -o bind /hdd3/OpenOffice.org1.1.4 /hdd3/debroot/home/zaurus/OpenOffice.org1.1.4 |
For preparing for the installation I have extracted the OpenOffice installation binary onto my SD card which can be easily shared between the Qtopia and chrooted Debian system. If you are installing to the SD card, make sure you have sufficient additional space for the extracted files or complement the space with a CF card and vice versa.
| # zcat OOo_SRX645_linuxarm_install.tar.gz | tar xvf - -C /mnt/card/Documents |
Now start the PocketWorkstation instance and open a terminal window from inside it.
|
# cd /mnt/card/Documents/instsetoo/unxlngr.pro/01/normal/ # ./setup |
![[openoffice install]](http://www.users.on.net/%7Ehluc/myZaurus/screenshots/sc-openoffice01.jpg)
Wait until the installer launches and install it chosing your desired options. Make sure you install to /home/zaurus/OpenOffice.org1.1.4 which is the default or you would need to change a few things manually to reflect the difference. Once installed you can start OpenOffice as follows:
|
# cd /home/zaurus/OpenOffice1.1.4 # ./soffice & |
![[openoffice start]](http://www.users.on.net/%7Ehluc/myZaurus/screenshots/sc-openoffice02.jpg)
If you see messages complaining about locale, then do the following:
|
# cd /home/root # echo "export LC_ALL=C" >> .profile # source .profile |
You can add OpenOffice to the icevm menu by adding the following into /etc/X11/icewm/programs
|
menu "OpenOffice" folder { prog "Writer" - sh -c "/home/zaurus/OpenOffice.org1.1.4/program/swriter" prog "Impress" - sh -c "/home/zaurus/OpenOffice.org1.1.4/program/simpress" prog "Draw" - sh -c "/home/zaurus/OpenOffice.org1.1.4/program/sdraw" prog "Math" - sh -c "/home/zaurus/OpenOffice.org1.1.4/program/smath" prog "Calc" - sh -c "/home/zaurus/OpenOffice.org1.1.4/program/scalc" } |
Make sure you are using the latest version of xqt-debian-scripts [xqt-debian-scripts_0.6_arm.ipk] which has additional support for mounting the extra OpenOffice loopback if it exists. If you have installed OpenOffice onto an additional loopback filesystem, you will also need to create /etc/openoffice.conf with the location of OpenOffice stored in it:
|
# echo "/home/zaurus/OpenOffice.org1.1.4" > /etc/openoffice.conf |
In addition you will need to modify startd to look as follows:
|
#!/bin/sh ### startup commands ### export DISPLAY=0:0 /usr/bin/icewm-session ### shutdown commands if [ -f /etc/openoffice.conf ]; then
umount /mnt/card 2>/dev/null umount /mnt/cf 2>/dev/null umount /proc |
Installing Mozilla (Firefox and Thunderbird)
Mozilla Firefox and Thunderbird on X/Qt
Make sure you install X/Qt first (either manually, using X/Qt jumbo package or the X/Qt jumbo cramfs image). Once that is done you can just install Firefox and Thunderbird.
To install firefox you need either the original [firefox_0.9gtk_armv5tel.ipk] or the modified [firefox0.9-3_arm.ipk]. If you are using the original package, you need to do the following:
|
# su # chown -R zaurus:qpe /usr/lib/firefox* |
If you have a C3000, space on /home is quite scarce so it is better to move the firefox profiles to somewhere with more space.
|
# su # mkdir -p /hdd3/zaurushome # mv /home/zaurus/.mozilla /hdd3/zaurushome # ln -s /hdd3/zaurushome/.mozilla /home/zaurus/.mozilla |
You can also create an icon on the Qt desktop for Firefox (unless you are using the modified version which already includes it). Create a firefox.desktop file in the appropriate location, eg /home/QtPalmtop/apps/Applications that looks like this:
[Desktop Entry] Name = Firefox Exec = runfirefox Comment = Mozilla Firefox Icon = mozicon50 Type = Applications Display = 640x480/144dpi,480x640/144dpi |
Now create a file /home/QtPalmtop/bin/runfirefox that looks like this:
#!/bin/sh xlauncher firefox |
Make runfirefox executable. This causes firefox to be launched and X is only loaded if it is not loaded yet.
![[Firefox]](http://www.users.on.net/%7Ehluc/myZaurus/screenshots/sc-firefox.jpg)
Thunderbird also requires X/Qt and works nicely as well if you have the X render update [xqt-libXrender_1.2.2_arm.ipk]. Make sure you install it if you manually installed X/Qt. If you have installed one of the xqt-jumpbopacks then there is no need to install it again since they alread include it.
To install thunderbird you need either the original [thunderbird_0.6_armv5tel.ipk] or the modified [thunderbird_0.6-3_arm.ipk]. If you are using the original package, you need to also install the pdaXrom compatible libraries [libstdc5-compat-sharp_0.5_arm.ipk] and [libiconv_1.8-2_arm.ipk].
On a C3000, space on /home is quite scarce so it is better to move the thunderbird profiles to somewhere else with more space as well.
|
# su # mkdir -p /hdd3/zaurushome # mv /home/zaurus/.thunderbird /hdd3/zaurushome # ln -s /hdd3/zaurushome/.thunderbird /home/zaurus/.thunderbird |
Mozilla Firefox and Thunderbird on Debian
As an alternative, the Debian build of Mozilla Firefox and Thunderbird can also be installed and they work perfectly. You will first need to install PocketWorkstation. Once that is done installing Firefox and Thunderbird is quite easy. From within a terminal in Debian:
|
# source /root/.profile # apt-get update # apt-get install mozilla-firefox # apt-get install mozilla-thunderbird # apt-get clean |
This assumes you are connected to the net. apt-get will download all the required packages and then install the mozilla app you selected. The following is a list of files it downloads and installs:
- cpp-3.3_1%3a3.3.5-12_arm.deb
- expat_1.95.8-3_arm.deb
- gcc-3.3-base_1%3a3.3.5-12_arm.deb
- libatk1.0-0_1.8.0-4_arm.deb
- libexpat1_1.95.8-3_arm.deb
- libfontconfig1_2.3.1-2_arm.deb
- libgcc1_1%3a3.4.3-12_arm.deb
- libglib2.0-0_2.6.4-1_arm.deb
- libgtk2.0-0_2.6.4-1_arm.deb
- libgtk2.0-bin_2.6.4-1_arm.deb
- libgtk2.0-common_2.6.4-1_all.deb
- libidl0_0.8.5-1_arm.deb
- libkrb53_1.3.6-2_arm.deb
- libpango1.0-0_1.8.1-1_arm.deb
- libpango1.0-common_1.8.1-1_arm.deb
- libpng12-0_1.2.8rel-1_arm.deb
- libstdc++5_1%3a3.3.5-12_arm.deb
- libtiff4_3.7.2-2_arm.deb
- libxcursor1_1.1.3-1_arm.deb
- mozilla-firefox_1.0.3-2_arm.deb
- mozilla-thunderbird_1.0.2-2_arm.deb
![[Thunderbird]](http://www.users.on.net/%7Ehluc/myZaurus/screenshots/sc-thunderbird.jpg)
Installing X/Qt applications
In order to use any of the following X/Qt applications, X/Qt needs to be installed first. See the X/Qt and/or X/Qt jumbo sections on how to do that. Once you have X/Qt installed and configured, you can install any of the following applications:
- abiword (Word Processor)
- flfm (File Manager)
- fltdj (Personal Information Manager)
- gimp (Graphics)
- gnumeric (Spreadsheet)
- xmms (Multimedia Player)
Installing QuantumStep
QuantumStep is a MacOSX environment for the Zaurus running under X/Qt. It comes with its own X/Qt binaries which is good for you if you haven't got X/Qt installed yet, but messes up your existing X/Qt setup slightly.
By default, the QuantumStep installer extracts the files to /home/myPDA which is the flash on the C3100. For the C3000, it relinks it to /hdd2/myPDA before extracting the files.
If you want to install it to a different location, you need to have an ext2/ext3 formatted disk either natively, or as a loopback filesystem. You will need at least 20MB of disk space for QuantumStep. If you create a loopback filesystem, make it at least 32MB.
To manually install it, you will need the following files:
- QuantumSTEP-ZED-DR7.mypkg
- quantumstep-setup
You will first need to extract QuantumSTEP-ZED-DR7.mypkg to an ext2/ext3 formatted disk, eg:
|
# su # dd if=/dev/zero of=/hdd3/quantumstep.ext3 # echo y | mke2fs -j /hdd3/quantumstep.ext3 # mkdir -p /mnt/quantumstep # echo "/hdd3/quantumstep.ext3 /mnt/quantumstep ext3 loop,rw,noatime 0 0" >> /etc/fstab # mount -o loop /hdd3/quantumstep.ext3 /mnt/quantumstep # zcat QuantumSTEP-ZED-DR7.mypkg | tar xvf - -C /mnt/quantumstep # cp quantumstep-setup /mnt/quantumstep # chmod 755 /mnt/quantumstep # echo "echo QuantumStep DR7.0" > /mnt/quantumstep/version #chmod 755 /mnt/quantumstep/version # cd /mnt/quantumstep # ./quantumstep-setup |
This is how it looks like once installed:
![[QuantumStep]](http://www.users.on.net/%7Ehluc/myZaurus/screenshots/sc-mac01.jpg)
You might want to move the quantum step icon from the Application tab to the X/Qt tab, and you can delete the quantumstep icon from the Settings tab.
Installing Wellenreiter
You need to install the following packages:
- libcopie1 - [libopie1_1.1.0-20031220_arm.ipk]
- libcopie2 - [libopie2_1.8.2-20031220_arm.ipk]
- libpcap - [libpcap0_0.7.2-20031220_arm.ipk]
- opie-wellenreiter - [opie-wellenreiter_1.0.2.1-20031220_arm.ipk]
Once Wellenreiter is installed, create a network profile for it as follows:
      Account
        Name: wellenreiter
      Config
        Non-Spec ESS-ID: "ANY" (unticked)
        ESS-ID: test
        Network Type: 802.11 Ad-Hoc
      WEP
        Key Type: Disabled
      PPoE
        Use PPoE Authentication (unticked)
      WEB Auth
        Use WEB Authentication (unticked)
      TCP/IP
        Obtain TCP/IP information Automatically (unticked)
        IP Address: 1.1.1.1
        Subnet Mask: 255.255.255.0
        Gateway: 1.1.1.0
      DNS
        Auto-detect name servers (ticked)
        Default domain: (leave empty)
      Proxy
        No proxy
|
Connect to this network and then start wellenreiter.
![[screenshot of wellenreiter]](http://www.users.on.net/%7Ehluc/myZaurus/screenshots/sc-wellenreiter.jpg)
Installing Kismet
You need to install the following packages:
- libstdc6 - [libstdc6_1.2.2_arm.ipk]
- libpcap - [libpcap0_0.7.2-20031220_arm.ipk]
- kismet - [kismet_2005.08.R1_arm.ipk] (contained in kismet-2005-08-R1-arm.tar.gz)
- kismet-qt - [kismet-qt_2.0.0_arm.ipk]
- kismet-misc - [kismet-misc_0.3_arm.ipk]
- netctl - [netctl_0.3.0-1_arm.ipk]
Once you have installed the packages, you need to do the following first if you have a C3000 :
|
# su # mkdir -p /home/root/usr # ln -s /opt/QtPalmtop/lib /home/root/usr/lib |
Then you need to symlink libpcap.so.1 as follows
|
# su # ln -s /home/root/usr/lib/libpcap.so.0.6.2 /home/QtPalmtop/lib/libpcap.so.1 |
Now modify /usr/local/etc/kismet.conf to update the following entries:
suiduser=zaurus source=wlanng,wlan0,wireless sound=true speech=true festival/usr/local/bin/flite flite=true logtemplate=/home/zaurus/Documents/%n-%d-%i.%l |
Once that is done create a network profile as follows:
      Account
        Name: kismet
      Config
        Non-Spec ESS-ID: "ANY" (unticked)
        ESS-ID: any
        Network Type: 802.11 Ad-Hoc
      WEP
        Key Type: Disabled
      PPoE
        Use PPoE Authentication (unticked)
      WEB Auth
        Use WEB Authentication (unticked)
      TCP/IP
        Obtain TCP/IP information Automatically (unticked)
        IP Address: 10.1.0.2
        Subnet Mask: 255.0.0.0
        Gateway: 10.1.0.1
      DNS
        Auto-detect name servers (unticked)
        Primary DNS: 10.1.0.1
        Secondary DNS:
        Default domain: (leave empty)
      Proxy
        No proxy
|
Note: you will need to install flite for the speech and sudo if you want to launch kismet from the GUI
![[screenshot of kismet]](http://www.users.on.net/%7Ehluc/myZaurus/screenshots/sc-kismet.jpg)
Installing Yahoo Messenger clone Qazoo
This works quite nicely, although I hate the default icon.
You need to install the following packages:
- libyahoo2 - [libyahoo2_cvs-20040713_arm.ipk]
- qazoo - [qazoo_0.8.1_arm.ipk]
- qazoosounds - [qazoosounds_0.8_arm.ipk]
![[screenshot of qazoo]](http://www.users.on.net/%7Ehluc/myZaurus/screenshots/sc-qazoo.jpg)
Installing mplayer (and kino2 or zplayer)
This version is specifically written for the C3000 and C3100, and uses the optimised bvdd drivers. Most video formats work, ie. mov, mpg, avi, asf.
You need to install the following packages for the stock Sharp ROM:
- libffmpeg - [libffmpeg_0.4.6_20030304_arm.ipk]
- libiconv - [libiconv_1.8-2_arm.ipk]
- kino2 - [kino2_0.4.3c_arm.ipk]
- bvdd - [bvdd_0.4.0-1_arm.ipk]
- mplayer-bvdd - [mplayer-bvdd_1.1.5-1_arm.ipk]
- zplayer - [zplayer_0.1.0_arm.ipk]
The intel wireless media extension (iwmmxt) is a feature of the Xscale CPUs which improves performance dramatically. It is utilised by the special iwmmxt edition of mplayer. It is faster than the regular version without iwmmxt but you will need Tetsu's kernel installed to take advantage of it since it needs some extra patches which the default Sharp kernel is missing but is included in Tetsu's special kernel.
kino2 and zplayer are graphical frontends for the console based mplayer. You don't need them, but they make things easier. You can use either of them with mplayer or none at all if you prefer to run mplayer from command line.
If you want to resize the default video aspect or compress them, have a look further down in the Video Conversion section.
In order to play videos fullscreen in kino2, you need to have the following settings set and enabled:
Video
|
This will let you play videos with 320x240 resolution in full screen. However, if you have files encoded with the standard PAL resolution of 352x288 then you need to have the following options as well:
Video
|
![[screenshot of kino2]](http://www.users.on.net/%7Ehluc/myZaurus/screenshots/sc-kino2.jpg)
You might also want to enable some of the other settings which may give you better performance. See the Video Conversion section to see how you can re-encode your videos to make them smaller but still give you reasonable playback quality.
zplayer can play videos in window mode or fullscreen if they are encoded with 320x200 resolution without adding extra parameters. However, in order to play 352x288 encoded PAL videos in fullscreen mode, you will need to provide the following mplayer options under Tools->Configuration:
|
-vo bvdd -vm -x 320 -y 200 |
![[screenshot of zplayer]](http://www.users.on.net/%7Ehluc/myZaurus/screenshots/sc-zplayer.jpg)
The following mplayer command line will allow you to watch fullscreen video:
|
# mplayer -vo bvdd -afm libmad -vm -vf crop=320:240 file |
The following mplayer options will give you better and smoother video playback:
|
# mplayer -nortc -noaspect -double -framedrop -cache 2048 -dr -vo bvdd -afm libmad -af lavcresample=44100 -vf crop=320:240 file |
And here is a list of the most useful mplayer options:
- -vm
- -vf-add scale=16:9
- -vf crop=320:240, rotate=1
- -af lavcresample=44100:0:0
- -afm libmad
- -hr-mp3-seek
- -dr
- -double
- -framedrop
- -noaspect
- -nortc
- -cache 1024
- -autosync 100
Installing Opera
Although this is an older package, it will still work with the C3000 and C3100.
You need to install the following packages:
- opera_sl-5x00-7.30.9965_arm.ipk
- opera-cseries-fix_7.30_arm.ipk
Once you installed the packages, you still need to do the following:
|
# su # ln -s /opt/QtPalmtop/opera /usr/share/opera # chown -R zaurus /home/zaurus/.opera # chown -R zaurus /home/zaurus/.operasave (optionally) # rm -r /home/QtPalmtop/opera/voice/# rm -r /home/QtPalmtop/opera/start/ |
![[screenshot of opera]](http://www.users.on.net/%7Ehluc/myZaurus/screenshots/sc-opera.jpg)
Alternatively, some newer packages have been build for the C3000 and C3100. You can try one of these instead:
- opera_7.25_c3k_1_arm.ipk
- opera_7.55.6079-SLC3000_arm.ipk
Installing Doom
To install Doom, you need to install the following packages:
- libsdl - [libsdl_1.2.5-slzaurus20050731_arm.ipk]
- libsdl-mixer - [libsdl-mixer_1.2.5cvs-1_arm.ipk]
- libsdl-net - [libsdl-net_1.2.5cvs-1_arm.ipk]
- doomdemo - [doomdemo_1.8-1_arm.ipk]
- prboom - [prboom_2.2.3-2_arm.ipk]
Once installed, copy prboom.cfg to /home/zaurus/.prboom, this file stores the doom key mappings which need to be fixed for the Zaurus and you can specify additional wad files too. The wad files should go into /home/QtPalmtop/shared/games/doom. You may want to copy doom.wad and doom2.wad and any other wad files you might have into that directory.
Doom runs quite nicely and you can use either doom1 or doom2 wad files.
Installing Quake
To install Quake, install the following packages:
- libsdl - [libsdl_1.2.5-slzaurus20050731_arm.ipk]
- libsdl-mixer - [libsdl-mixer_1.2.5cvs-1_arm.ipk]
- libsdl-net - [libsdl-net_1.2.5cvs-1_arm.ipk]
- quake - [qpe-quake_1.5.0-2_arm.ipk]
- quake-data - [qpe-quake-data_1.5.0-1_arm.ipk]
Change /home/QtPalmtop/bin/run_quake and update the line which looks like this:
quake -nosound -width 150 -height 135 -basedir /opt/QtPalmtop/quake/data
to:
|
quake -fullscreen -width 320 -height 240 -basedir /opt/QtPalmtop/quake/data |
Quake is awfully slow in fullscreen mode, but even if you reduce the window size, it is still quite slow.
You can also try QuakeII under Debian. This assumes you already have a working PocketWorkstation. To install quake2, you first need to make sure apt-get is able to find it. To do that edit /etc/apt/sources.list and add the following:
|
deb http://ftp.debian.org/debian sarge contrib |
Then do the following:
|
# source /root/.profile # apt-get update # apt-get install quake2 # apt-get clean |
This assumes you are connected to the net. apt-get will download all the required packages and then install quake2. The following is a list of files it downloads and installs:
- libao2_0.8.6-1_arm.deb
- libasound2_1.0.8-3_arm.deb
- libsdl1.2debian-oss_1.2.7+1.2.8cvs20041007-4.1_arm.deb
- libsdl1.2debian_1.2.7+1.2.8cvs20041007-4.1_arm.deb
- quake2-data_13_all.deb
- quake2_1%3a0.3-1.1_arm.deb
It also downloads the demo version of quake2 from Id's site and extracts the pak file. Once installed, you can add to or replace the pak files which are located at /usr/share/games/quake2/baseq2. The quake2 executable is /usr/lib/games/quake2/quake2.real if you prefer to run it directly from the command line instead of launching it from the icewm menu.
Installing Heretic
To install Heretic, you need to install the following packages:
- libsdl - [libsdl_1.2.5-slzaurus20050731_arm.ipk]
- libsdl-mixer - [libsdl-mixer_1.2.5cvs-1_arm.ipk]
- libsdl-net - [libsdl-net_1.2.5cvs-1_arm.ipk]
- heretic-demo - [heretic-demo_1.2-3_arm.ipk]
- heretic-engine - [heretic-engine_1.0.4-2_arm.ipk]
Once installed, leave the option "Display with magnified screen" ticked. It will automatically go full screen and have the right landscape orientation.
Installing ltris and other lgames
This applies to the following games:
- barrage - [barrage_1.0.2_arm.ipk]
- lgeneral - [lgeneral_1.2beta-2_arm.ipk]
- lmarbles - [lmarbles_1.0.7-2_arm.ipk]
- ltris - [ltris_1.0.10-2_arm.ipk]
If you cannot save your results or start the game, do the following:
|
# su # chown -R zaurus /home/zaurus/.lgames |
Installing Supertux
Once you have installed supertux you need to change /home/QtPalmtop/bin/supertux.sh (this assumes you already have sudo configured to allow you to mount and unmount, see sudo section):
|
#!/bin/sh -e BASE=`grep "/QtPalmtop/$" /usr/lib/ipkg/info/supertux.list | tail -n 1` #sudo mount ${BASE}share/supertux.cramfs ${BASE}share/supertux -o ro,loop sudo mount ${BASE}share/supertux.cramfs ${BASE}data -o ro,loop supertux #sudo umount ${BASE}share/supertux sudo umount ${BASE}data |
Installing FreeCiv
You need the following packages/files:
- stdsounds2.tar.gz
- freeciv_zaurus_0_0_5_bin.tar.bz2
To install freeciv do the following:
|
Create freeciv.desktop in /opt/QtPalmtop/apps/Games as follows:
|
[Desktop Entry] Comment=Freeciv Exec=runciv Icon=civclient Type=Application Name=FreeCiv Display=640x480/144dpi,480x640/144dpi |
Run the TabSetting config app under Settings and press OK to save the new config. This will result in the freeciv icon to be visible in the Games tab without rebooting or restarting Qtopia.
Installing pico
Pico depends on the ncurses library so in order to install pico, install the following packages in the given order:
- libncurses_5.0_arm.ipk
- pico_4.4_arm.ipk
Installing file
Once you have installed file [file_3.39-2_arm.ipk] it will not work until you do the following:
|
# file -C |
Installing Cacko packages
Packages for Cacko and Sharp ROM are generally compatible and interchangable. You can install Cacko packages onto the Sharp ROM and use Cacko feeds.
Cacko is basically an enhanced and customised Sharp ROM. As such, there are applications that are pre-installed on Cacko but don't exist on Sharp ROM. See the Cacko sub section under the Alternate Distros/ROMs section for more details about the differences between Cacko ROM and Sharp ROM.
Here are some packages extracted from Cacko that can be installed to enhance Sharp ROM:
- qtopia-sysinfo_1.23_arm.ipk - enhanced sysinfo tool with process and mount controls
- qtopia-addressbook_1.23_arm.ipk - addressbook with alphanumeric sorting support
- qtopia-combbatteryapplet_1.0.6_arm.ipk - updated battery applet with overclocking/underclocking support
- qtopia-memoryapplet_1.0.3_arm.ipk - updated memory applet with better swapfile management (there is a more updated version which supports larger swap files)
- qtopia-keyboardapplet_1.0.0_arm.ipk - keyboard layout mapper applet
- qtopia-network-usblan_1.0.0_arm.ipk - network config for usb lan adaptor
- qtopia-network-bluetooth_1.0.0_arm.ipk - network config for bluetooth adaptor
- vga-console-font_1.0-1_arm.ipk - vga console font
qtopia-sysinfo_1.23-2_arm.ipk is an even more enhanced sysinfo tool based on the Cacko one and displays more detailed disk info.
![[diskinfo]](http://www.users.on.net/%7Ehluc/myZaurus/screenshots/sc-diskinfo01.jpg)
![[diskinfo]](http://www.users.on.net/%7Ehluc/myZaurus/screenshots/sc-diskinfo02.jpg)
![[diskinfo]](http://www.users.on.net/%7Ehluc/myZaurus/screenshots/sc-diskinfo03.jpg)
qtopia-memoryapplet_1.0.4_arm.ipk is a modified version of the memory applet for the C3x00 series that can create a swapfile on /hdd3 and larger swapfile size up to 512MB.
Building your own Packages
You can also build your own packages (ipk files) if you have written some useful scripts or written some applications that you want to distribute and let others install easily with the standard package manager.
I have build a package ipktools [ipktools_0.3.5_arm.ipk] which has a set of tools for manipulating ipk files:
- newipk - creates a package template structure for you to add files to for packaging
- makeipk - package up a directory that contains files in an ipk structure into an ipk file
- unpackipk - extracts the contents of an ipk file into a directory structure for repackaging
- deb2ipk - converts a deb file into an ipk file format
- zipipk - zip up an ipk file and remove ipk file afterwards
- compatipk - attempts to make an ipk packaged for another distro to be more compatible with the Sharp system in terms of filesystem structure
- xipk - installs ipk to alternate location other than main memory
- xipk-link - links files and directory installed to alternate locations (used by xipk)
- xipk-build - used to build cramfs/squashfs images (installs the package to the image without registering it into the package repository)
- ipkg-link - links files and directory installed by ipkg
- ipkg-make-index - generates the Packages file needed for a feed
- pkgsize - reports the installed size of the files making up the package
- ar - extract the .deb/.ipk packages
- mkcramfs - create cramfs image
- mksquashfs - create squashfs image
There currently are two ipk file formats. One uses the tar and gz format wheras the other uses a different format that is similar or the same as the format used for deb files. The Zaurus with default Sharp ROM uses the tar and gz format, which basically is a gzipped tarball (.tgz or .tar.gz) with a control structure and renamed to .ipk. If you extract this ipk file, you will find 3 files inside it - a text file called debian-binaries which just contains the string 2.0, and two .tar.gz files called control and data. The control.tar.gz file contains a text file called control which has informaton about the package such as the Maintainer's name, dependencies, version, description, etc. There may also be some optional shell scripts for doing some pre and post configuration tasks during install and uninstall. Finally, the file data.tar.gz contains all the files and directory structure of the files for their destination location.
To unpack an ipk file to see what is inside it, do the following:
|
# unpackipk somefile.ipk |
To create your own ipk file, do the following to create the ipk file structure:
|
# newipk myprojectk |
Then once you add your files in the correct locations and also update the control file with the information about your application, you can create your ipk file with the following command:
|
# makeipk myprojectk |
Back to Main Page
DISCLAIMER: The information contained on this site is provided AS IS. No assurance is given to the accuracy of the information or instructions provided. You may use this as a guide but do not blame me if anything bad happens to your system or your data. Use anything described on this site at your own risk. I shall not be made responsible for anything you do.